Auntie Nosebag’s Weekly Recipes

כ״ב שבט ה׳ תשע״א – Thursday 27 January 2011

She’s vile, she’s uncensored, she tells it like it is: She’s Auntie Nosebag

Great fun reading unless she’s talking about you “darling!”

Dears, Now that you’ve read my Astrology Column I wanted to share my marvelous wisdom with you….Uranus has been playing hide and seek with Mars this month while Pluto has triangulated with Venus which will wreck havoc on people’s digestive enzymes for the next few weeks. I always try to lower the acidic levels by eating vegetables in creative fun ways. Try my stuffed mushroom recipe for a real treat.

Foods of the Zodiac: I just love fatty desserts, just go ahead

Foods of the Zodiac: I just love fatty desserts, just go ahead

24 large mushrooms

¼ cup sliced green onions

1 clove garlic, minced

¼ cup butter

2/3 cup bread crumbs

5/8 cup shredded smoked cheese

  • Rinse, mushrooms and remove stems, reserve caps.

  • Chop stems and cook with onions and garlic in butter until tender. Stir in bread crumbs and cheese.

  • Spoon mixture into mushroom caps and arrange in dish and bake 425 degree oven for 10 minutes.

**You can even add those left over cooked veges to add extra flavor and utilize those left overs.

Auntie Nosebag

Auntie Nosebag

Tree-Milk Fertility Enhancer

31January2023 by Lazer Brody
https://lazerbeams.com/tree-milk-fertility-enhancer/

Tree-Milk Fertility Enhancer

This post is great for vegans as well and those who are lactose-intolerant. In addition, for those who seek a natural and effective fertility enhancer, this is just what you need:

Dates, especially those grown here in Israel, have magical qualities. If you know anyone with a fertility issue – man or woman – the following simple fertility enhancer is bound to help them. The tree-milk we’re about to prepare is based on Israel-grown Medjool dates and raw, non-toasted almonds. If you can get both from Israel, that’s optimal, but not an absolute must. You’ll enjoy this:

Tree-Milk Fitness and Fertility Enhancer

Variation Number One: Basic almond milk.

The Brody recipe is dummy-proof and easy to prepare. This will taste like bovine milk, with the same slight hint of sweetness like lactose in whole milk. All you need are the following three ingredients:

  1. One cup of dried, raw, non-toasted and unsalted almonds (approx. 80 almonds or 225 gr.)
  2. One liter/quart of water
  3. 2 Medjool dates, pitted

Soak the almonds overnight in a liter of cool water. The next morning, add the almonds with the water they soaked in and the dates to a blender, preferably with a high-speed capability and strong motor. Blend the ingredients at high-speed for 1.5-2 minutes. strain the mixture in a clean dish towel. Don’t discard the the pulp, for it’s a great additive to yogurt. At this point, you’ll have a wonderful basic almond milk that’s great in your coffee and non-dairy as well. For more sweetness, add another date.

Variation Number Two: Tree-Milk Fitness and Fertility Enhancer

Ingredients:

  1. One cup of dried, raw, non-toasted and unsalted almonds (approx. 80 almonds or 225 gr.)
  2. One liter/quart of water
  3. 8 large or 12 medium Medjool dates, pitted
  4. One tablespoon of bee honey (natural unpasteurized with no additives)
  5. Optional (for supercharged fertility and a berry-milk taste) – 5 tablespoons of Goji berries
  6. One teaspoon of raw, dried and shelled pumpkin seeds
  7. One teaspoon of raw, dried and shelled sunflower seeds
  8. 6 ice cubes

Soak all the ingredients except for the honey and the ice cubes in a liter of cool water overnight. In the morning, put the water with the soaked almonds, dates, seeds and Gojis (optional) in high-speed blender and add the honey and ice cubes. Blend it all together at high speed for two minutes. Both husband and wife should drink at least 250 cc’s of the mixture (about 9 ounces) at morning and at early evening. The effects are remarkable.

The above Tree-Milk not only does wonders for fertility, but it enhances stamina as well. It has plenty of fiber, Vitamin E and zinc. It’s great also to drink about an hour before a strenuous resistance workout. It’s the real deal…

Don’t forget to send me an invitation to the birth celebration. You can almost set the date…

The Land of Milk and Honey

The Torah describes the Land of Israel as a land “flowing with milk and honey” (Exodus 13:5). Rashi explains that the honey the Torah is talking about is not that of the bees, but date honey, for ripe Land of Israel dates, especially the Medjool variety, are sweet as honey. If we are exacting in the Torah’s terminology of a land flowing with milk and honey – referring to the land and not the insects or animals – then we can interpret that the milk comes from the land as well. In other words, the Torah could be referring to something other than cow milk or goat milk. In the case of the almond, such a Torah interpretation is a perfect fit. That’s why we wrote this article in honor of Tu B’Shvat.

Our Almond milk is a highly nutritious alternative to cow milk, especially for those who suffer from lactose intolerance and therefore have difficulty digesting cow milk. It’s also perfect for vegans who avoid foods from animal sources. And, it’s parve, allowing you to drink your favorite coffee with milk after a meat meal.

Have a lovely Tu B’Shvat! (This year, Monday, Feb. 6, 2023).

Here’s your amazing opportunity to plant fruit trees in the Land of Israel.

Quinoa Milk great for Pesach!

http://www.geniuskitchen.com/recipe/quinoa-milk-385896?soc=socialsharingfb

Submitted byChef #1354715

“This recipe is more creating a milk from quinoa. Quinoa, a “grain” from South America (’tis actually a seed), is a great source of Iron and calcium, as well as being a complete protein. This makes it a good choice for individuals who (for whatever reason) do not consume dairy products.

The recipe is based off of the one found here:
http://www.kimmykokonut.com/2008/05/22/teaching-and-cooking-in-peru-with-food-pictures/

Please note: this milk has a consistency of thin porridge before straining.
After straining, depending on the amount of water added, it should have a consistency of rice milk.

This milk has a nutty flavor. It tastes a bit like unsweetened soy milk. You can of course, add sweeteners and flavorings to your quinoa milk (I recommend almond extract) so you can probably get it to a taste that is very similar to commercially purchased rice or almond milk.

Good luck!”


READY IN:8hrs 30mins
SERVES:4
YIELD:4 cups

INGREDIENTS

  • 12cup white quinoa (for color of the final milk. Pink milk= nasty!)
  • water, as needed (filtered if desired)
  • 1pinch salt

DIRECTIONS

  • 1. Place the uncooked quinoa in a fine-mesh seive and wash, wash, wash it. Why? Quinoa seeds have a bitter coating called saponin that you want to wash off.).
  • 2. Put the washed quinoa into a glass container with a lid. Cover the seeds with water, put the lid on it, pop it in the fridge overnight.
  • 3. The next morning, pour the soaked quinoa into a seive and wash it again.
  • 4. Put the quinoa into a pot with 2 cups fresh water (not the water it soaked in) and a pinch of salt. Bring it to a boil, covered.
  • 5. Turn the heat down and simmer the quinoa (covered) until all the water is absorbed, about 20 minutes.
  • 6. place the cooked quinoa in a blender with 2 more cups of water.
  • 7. Blend on high for 1 mkinute, then add water until the milk reaches your desired consistency. You would add any desired sweeteners and flavorings at this point.
  • 8. Strain the quinoa milk through a fine cheesecloth (a clean napkin will do) into a bowl. Note that, even with the straining, there will still be flecks of quinoa in the milk. These will settle out later, so don’t worry.
  • 9. Pour the quinoa milk into a clean quart-size jar, and stick it in thew fridge to cool.
  • Note that the milk may seperate a little. This is okay. Just give it a little stir.
  • The milk will keep about a week, unless you freeze it (I guess you could freeze it? I’ve never tried.).
  • Happy quinoa-milk making!

How To Make Any Nut Milk

https://www.thekitchn.com/homemade-cashew-milk-243347

Makes 2 cups

What You Need

Ingredients

  • 1 cupraw, unsalted cashews, or any raw nuts without skins
  • 2 cupswater, plus more for soaking
  • Sweeteners, such as honey, sugar, agave syrup, or maple syrup (optional)
  • Equipment
  • Bowls
  • Strainer or colander
  • Measuring cup
  • Blender or food processor
  • Fine-mesh nut bag or cheesecloth

Instructions

  1. Soak the nuts: Place the nuts in a medium bowl. Cover with about 1 inch of water. Cover the bowl with a cloth and let sit overnight at room temperature or for up to 2 days in the refrigerator. The nuts will plump as they absorb water and should feel a little squishy if you pinch them. The longer the nuts soak, the creamier the milk will be.
  2. Drain and rinse the nuts: Drain the nuts through a fine-mesh strainer or colander, then rinse them thoroughly under cool running water.
  3. Combine the cashews and water in a blender: Place the nuts in a blender (or a food processor) and add the 2 cups of water.
  4. Blend on high speed: Pulse the blender a few times to break up the nuts, then blend continuously on high speed for 3 minutes. The nuts should be broken down into a very fine meal, and the water should be white and opaque. (If using a food processor, process for 4 minutes total, pausing to scrape down the sides halfway through.)
  5. Strain out the nut meal: Line the fine-mesh strainer or colander with either an opened nut bag or 2 layers of cheesecloth and set over a measuring cup (or bowl if you don’t have one big enough). Pour the nut mixture through the strainer. Gather the nut bag or cheesecloth around the nut meal and twist close. Squeeze and press with clean hands to extract as much nut milk as possible. You should get about 2 cups.
  6. Sweeten to taste: Taste the nut milk, and if a sweeter drink is desired, add sweetener to taste.
  7. Refrigerate the nut milk: Store the nut milk in sealed containers in the refrigerator for up to 4 days. Save the nut meal for another use.

Recipe Notes

Storage: Leftover nut milk can be stored in an airtight container in the refrigerator for up to 4 days. If it separates, just shake to recombine.

2 Ingredient Raw Cashew Milk

Cashew Milk


This 2 ingredient raw cashew milk is my all time favorite plant milk. It’s really creamy, easy to make and cheaper than store bought.

  • Author: Minimal Eats
  • Prep Time: 5 mins
  • Total Time: 5 mins
  • Yield: 3 cups (750 ml)
  • Category: Drink
  • Cuisine: Vegan, Gluten Free

Ingredients

  • 3 cups water (750 ml)
  • 1 cup raw unsalted cashews (140 g)

Instructions

  1. Soak the cashews in water overnight (optional).
  2. Drain the cashews and blend them with the water until well blended and almost smooth.
  3. Strain the milk using a cheesecloth or a strainer. You can use a napkin too.
  4. Store the cashew milk in a sealed container in the fridge for 2 or 3 days.

Nutrition

  • Serving Size: 1 cup (250 ml)
  • Calories: 153
  • Sugar: 1.3 g
  • Sodium: 11 mg
  • Fat: 12.4 g
  • Saturated Fat: 2.4 g
  • Carbohydrates: 8.7 g
  • Fiber: 0.8 g
  • Protein: 4.1 g

Find it online: https://simpleveganblog.com/2-ingredient-raw-cashew-milk/

The Ultimate Plant-Powerful Dairy-Free Milk Guide

https://yumuniverse.com/plant-powerful-dairy-free-milk/

The Ultimate Plant-Powerful Dairy-Free Milk Guide

There truly are infinite possibilities when it comes to a plant-based diet and milk is no exception. While there are more and more pre-packaged options hitting grocery store shelves these days for non-dairy milks, nothing tastes as delicious, offers as much variety, or packs the additive/preservative-free, nutrient punch that homemade does. I have been pulling this post together for YU for a while now, and I hope that it inspires some fun and experimentation.

I’ve also included suggestions for what to do with leftover pulp and ideas for how to fancy up your milks…

All recipes below are gluten-free. Just make sure if preparing oat milk, that you use gluten-free oats, and that your vanilla extract and cocoa are gluten-free.

Tools:
Nut milk bag or cheesecloth*
Blender
Recycled glass jars for storage

* I own one nut milk bag and about 20 scraps of cheesecloth that I cut up from one purchase. You can definitely hand wash, machine wash and re-use these guys for years. Just find a fun jar like Darth Vadar below, to keep them in.


Ingredients:
See below, but try to buy everything organic. Here’s why.

Basic steps for all (unless otherwise specified):


Soak: soaking is necessary to release enzyme inhibitors and improve nutrient digestion/assimilation. Toasting does help, too (about 70%), while bringing out a rich, “toasty” flavor for milks. I have indicated below, what to do with particular ingredients, what they taste like, how long to soak for each and what add-ins would take these milks to the next level of deliciousness. Do not use your soak water for milk, all of your enzyme inhibitors are in here, so use fresh water.

Or Toast: while soaking is optimal from a nutrition standpoint, toasting brings out incredible flavor. When toasting any ingredients, use raw, unsoaked ingredients to toast. The dryness is what brings out that toasted flavor, and you won’t get that with pre-soaked, hydrated ingredients.

Rinse: rinse soaked ingredients well.


Blend together: using your highest setting, blend until as smooth as possible.

Strain: using your nut milk bag, or a cheesecloth, draped over a bowl or large glass, pour blended contents through fabric.…


Squeeze: twisting from the top down, squeeze all liquid from fabric…


… bottle it up.


Now, you can sweeten to taste, or blend/stir in any of the add-in suggestions below. I recommend trying these milks unsweetened first, so you can detect the differences in taste to see what you like best, and if you need any sweetener at all.

YU can use any of the following to create creamy, delicious, nutrient-rich non-dairy milks (try combinations, too):


Almonds:
1/2 cup raw almonds
2 cups pure water (use coconut water for extra sweetness and electrolytes)
Soak time: 8-12 hours

Steps: prepare either soaked almonds (8-12 hours) or toasted almonds (7 minutes at 350°F). Blend together and strain through cheesecloth. Serve chilled, room temp or warm.

Taste/consistency: toasted is a rich almond flavor and raw is a creamy, neutral flavor that almost everyone loves. This is a tasty non-dairy milk for beginners as it is delish without sweetening and can be enjoyed on its own.

Add-ins: 1/4 tsp vanilla extract, 2 tsp raw wild-harvested honey or grade B maple syrup and pinch of fine ground sea salt.

Make it fancy: add cardamom and cocoa.

Nutritional bennies: almonds are some of the most alkalizing nuts around, and they have cholesterol lowering effects. They’re also loaded with antioxidant powerful vitamin E, immune-supporting magnesium and the electrolyte potassium, too.

– – –


Amaranth:
1/2 cup raw amaranth
2 cups pure water (use coconut water for extra sweetness and electrolytes)
Soak time: 6-8 hours

Steps: prepare either soaked amaranth or toasted amaranth (5 minutes at 350°F) or popped (get instruction here). You will have to rinse any soaked amaranth through a cheesecloth, since they are so tiny. Blend together and strain the milk through the cheesecloth. Serve chilled, room temp or warm.

Taste/consistency: popped or toasted tastes a little like liquid popcorn. Very unique, nutty flavor.

Add-ins: 1/4 tsp vanilla extract, 2 tsp raw wild-harvested honey or grade B maple syrup and pinch of fine ground sea salt.

Make it fancy: blend with 2 tsp sucanat, 1/4 tsp vanilla extract and a pinch of fine ground sea salt for a “caramel corn” treat. Use that same combo but with molasses instead of sucanat for “Cracker Jack” flavor. Or serve blended with fresh lime juice, raw honey, a drop of vanilla and a pinch of cayenne. Or maple syrup, cocoa, 1/8 tsp cinnamon and a pinch of cayenne for a rich, Mexican treat.

Nutritional bennies: Amaranth contains more protein than any other gluten-free grain. Food scientists consider the protein content of amaranth of high “biological value,” similar to the proteins found in cow’s milk. This means that amaranth contains an excellent combination of essential amino acids and is well absorbed in the intestinal tract. It’s full of calcium, magnesium, fiber and iron.

– – –


Brazil Nuts:
1/2 cup raw Brazil nuts
2 cups pure water (use coconut water for extra sweetness and electrolytes)
No soaking

Steps: no need to soak Brazil nuts because they don’t have any (or very little) enzyme inhibitors, but you can toast them (7 minutes at 350°F). Blend together and strain through cheesecloth (you way want to strain twice). Serve chilled, room temp or warm. This is hands-down one of my favorite milks for cereal, smoothies and tea. Store in the fridge, these guys tend to go rancid easily. Fresh Brazil nuts should be ivory, not yellow.

Taste/consistency: creamy, rich, unique Brazil nut flavor. Beautiful white milk. This is a tasty non-dairy milk for beginners as it is delish without sweetening and can be enjoyed on its own. Texturally, it is the most like traditional whole dairy milk— very creamy.

Add-ins: 1/4 tsp vanilla extract, 2 tsp raw wild-harvested honey or grade B maple syrup and pinch of fine ground sea salt.

Make it fancy: Add cardamom and cocoa. Or orange zest, a bit of orange juice, honey and vanilla extract. Mixed berries blended in are also amazing.

Nutritional bennies: help to promote heart health, offer up a solid serving of magnesium, and are packed with beneficial selenium (774% of RDA) which is essential for immune support and thyroid function.

– – –


Brown Rice:
1/2 cup cooked brown rice
2 cups pure water (use coconut water for extra sweetness and electrolytes)
No soak necessary, but you can for 6-8 hours

Steps: I like to toast rice (without any oil) in a pot, stirring occasionally over medium-high heat for about 7 minutes before adding water and cooking. Blend together cooked rice and water and strain through cheesecloth. You may have to strain twice. This is a good milk for add-ins like cocoa, or sweeteners like honey, since on it’s own, I find it a bit on the starchy side.

Taste/consistency: creamy in a starchy way, with a mild, almost undetectable grittiness. Very mild, toasted brown rice flavor.

Add-ins: 1/4 tsp vanilla extract, 2 tsp raw wild-harvested honey or grade B maple syrup and pinch of fine ground sea salt.

Make it fancy: 1/4 tsp cinnamon, 1/4 tsp vanilla extract, raw honey and rosewater to taste. Or 1/4 tsp cinnamon, pinch cayenne, raw honey, 1/4 tsp vanilla extract and 2 tsp cocoa.

Nutritional bennies: great source of trace mineral manganese, and good source of selenium and magnesium.

– – –


Buckwheat:
1/2 cup raw, hulled buckwheat groats—sprouted or toasted
2 cups pure water (use coconut water for extra sweetness and electrolytes)
Soak time: 8 hours

Steps: you can use raw, sprouted buckwheat or toasted for milk, but I don’t recommend cooked—you’ll get a gooey, gel-like texture. Toast buckwheat (7-10 minutes at 350°F). Blend soaked or toasted buckwheat together with water and strain through cheesecloth. Serve chilled.

Taste/consistency: raw, sprouted buckwheat milk tastes, fresh, light and delicious with a hint of grassy-in-a-sunny-way. A very fine grit. Toasting definitely brings out the unique flavor of buckwheat—cereal-like. This would be a great milk for add-ins or as a smoothie base.

Add-ins: 1/4 tsp vanilla extract, 2 tsp raw wild-harvested honey or grade B maple syrup and pinch of fine ground sea salt.

Make it fancy: Add cardamom, maple syrup and cocoa. Mixed berries blended in are also amazing—try blackberries and add a bit of fresh thyme, maybe lemon juice and raw, wild-harvested honey.

Nutritional bennies: contrary to what the name implies, buckwheat doesn’t contain wheat. It’s not a grain, but a seed! Buckwheat is gluten-free, a good source of protein, it contains eight essential amino acids and is known to balance mood, mind clarity and it even provides calcium, manganese and vitamins B and E.

– – –


Cashews:
1/2 cup raw cashews, soaked 2-4 hours
2 cups pure water (use coconut water for extra sweetness and electrolytes)
Soak time: 2-4 hours

Steps: blend together ingredients and strain through cheesecloth (although straining is optional since cashews blend so well). Serve chilled, room temp or warm. This is hands-down one of my go-to milks for recipes like soups and puddings.

Taste/consistency: very creamy, almost buttery neutral flavor, great for add-ins and use in sweet and savory recipes.

Add-ins: 1/4 tsp vanilla extract, 2 tsp raw wild-harvested honey or grade B maple syrup and pinch of fine ground sea salt.

Make it fancy: add cardamom, cayenne and cocoa. Or orange zest, a bit of orange juice, honey and vanilla extract. Mixed berries blended in are also amazing.

Nutritional bennies: while it is referred to as a “cashew nut”, cashews are actually the seeds of the cashew tree. Cashews have a mild buttery flavor and they can be eaten whole, or ground into cashew butter. Approximately 75% of thier unsaturated fatty acid content is oleic acid—heart-healthy monounsaturated fat. Studies of diabetic patients show that monounsaturated fat, when added to a low-fat diet, can help to reduce high triglyceride levels. Everyone knows that calcium is necessary for strong bones, but magnesium is also vital for healthy bones—and cashews are a great source.

– – –


Young Thai Coconut:
Meat from 1 young Thai coconut (not to be confused with mature coconut)
Water from 1 young Thai coconut
No soaking

Steps: blend together ingredients and add a bit more pure water if you need to, to reach desired consistency.

Taste/consistency: very creamy, delicious, unique Thai coconut flavor. When used in heated recipes like soups the coconut flavor is more undetectable.

Add-ins: 1/4 tsp vanilla extract, 2 tsp raw wild-harvested honey or grade B maple syrup and pinch of fine ground sea salt.

Make it fancy: add cardamom and cocoa. Or orange zest, a bit of orange juice, honey and vanilla extract. Mixed berries blended in are also amazing.

Nutritional bennies: helps prevent heart disease, contains anti-inflammatory and anti-microbial properties, promotes weight maintenance and coconut water is a natural isotonic beverage filled with electrolytes. Coconut meat is also an excellent source of medium chain fatty acids, protein, fiber, vitamins and minerals.

– – –


Unsulphured Shredded Coconut:
1/2 cup unsulphured shredded coconut
2 cups pure water (use coconut water for extra sweetness and electrolytes)
Soak time: you can soak about 2 hours to soften

Steps: Blend together soaked, raw or toasted ingredients and strain. For incredible flavor, toast coconut in an oven set to 350°F for 3 minutes before blending.

Taste/consistency: delicious undeniable coconut flavor for toasted, a bit more subtle in un-toasted.

Add-ins: 1/4 tsp vanilla extract, 2 tsp raw wild-harvested honey or grade B maple syrup and pinch of fine ground sea salt.

Make it fancy: Add cardamom and cocoa. Or orange zest, a bit of orange juice, honey and vanilla extract. Mixed berries = delish.

Nutritional bennies: helps prevent heart disease, contains anti-inflammatory and anti-microbial properties. Coconut meat is also an excellent source of medium chain fatty acids, protein, fiber, vitamins and minerals.

– – –


Hazelnuts:
1/2 cup raw hazelnuts (a.k.a. filberts)
2 cups pure water (use coconut water for extra sweetness and electrolytes)
No soaking

Steps: no need to soak hazelnuts because they don’t have any (or very little) enzyme inhibitors, but you can toast them (7 minutes at 350°F) for incredible flavor. Blend together soaked or toasted and strain through cheesecloth. Serve chilled, room temp or warm. This is one of my favorite milks for cereal, smoothies and tea—divine.

Taste/consistency: creamy, rich, unique hazelnut flavor. Beautiful white milk. This is a tasty non-dairy milk for beginners, as it is delish without sweetening and can be enjoyed on its own. My pal Marta was over tasting with me one day, and said that toasted hazelnut milk was “off the freaking hook.” I can’t think of a more accurate description.

Add-ins: 1/4 tsp vanilla extract, 2 tsp raw wild-harvested honey or grade B maple syrup and pinch of fine ground sea salt.

Make it fancy: add cardamom and cocoa. Or orange zest, a bit of orange juice, honey and vanilla extract. Mixed berries blended in are also amazing. Serve warm with mint leaves and honey. Serve warm with fresh thyme, honey and vanilla.

Nutritional bennies: hazelnuts are loaded with key minerals like magnesium, phosphorous, zinc, copper, iron, manganese, calcium and selenium. Whew. They also provide vitamin K, potassium and vitamin E.

– – –


Hemp Seed:
1/2 cup raw hemp seed (a.k.a. hemp nut)
2 cups pure water (use coconut water for extra sweetness and electrolytes)
No soaking

Steps: no need to soak hemp seeds, just blend together and strain through cheesecloth, although this is an optional step since they blend up nicely. Serve chilled or room temp. Store hemp seed in the fridge or freezer, they are loaded with fragile essential fatty acids and can go rancid easily.

Taste/consistency: looks a tad like a sesame seed and has a delicious, buttery, nutty flavor similar to that of a pine nut or sunflower seed. Very creamy, unique, pale green milk.

Add-ins: 1/4 tsp vanilla extract, 2 tsp raw wild-harvested honey or grade B maple syrup and pinch of fine ground sea salt.

Make it fancy: add cardamom and cocoa. Mixed berries blended in alone, or with cocoa and maple syrup are divine options as well. I love this milk blended with blueberries.

Nutritional bennies: hemp protein contains all 21 known amino acids (complete protein), including the 9 essential ones that adult bodies cannot produce. Hemp seeds are considered by leading researchers and medical doctors, to be one of the most nutritious food sources on the planet. Shelled hemp seed is 33% pure digestible protein and rich in iron and vitamin E (3x the amount in flax) as well as omega-3 and GLA.

– – –


Macadamia Nuts:
1/2 cup raw macadamias
2 cups pure water (use coconut water for extra sweetness and electrolytes)
No soaking

Steps: no need to soak macadamia nuts because they don’t have enzyme inhibitors. Blend together and strain through cheesecloth (you may want to strain twice). Serve chilled, room temp or warm. This is one of my favorite milks for cereal, smoothies and tea.

Taste/consistency: creamy, rich, buttery flavor. Beautiful white milk. This is a tasty non-dairy milk for beginners as it is delish without sweetening and can be enjoyed on its own.

Add-ins: 1/4 tsp vanilla extract, 2 tsp raw wild-harvested honey or grade B maple syrup and pinch of fine ground sea salt.

Make it fancy: add lime zest, raw honey and vanilla extract. Mixed berries blended in are also amazing. Cocoa powder, vanilla extract and maple syrup make for an incredible, rich dessert milk.

Nutritional bennies: a good source of vitamins like thiamine, riboflavin, niacin, vitamin B6 and pantothenic acid. Also rich in minerals like manganese, calcium and potassium.

– – –


Millet:
1/2 cup millet (sprouted, cooked or toasted)
2 cups pure water (use coconut water for extra sweetness and electrolytes)
Soak time: 8-12 hours

Steps: Blend together and strain through cheesecloth. Serve chilled, room temp or warm.

Taste/consistency: nutty, almost corn-like in flavor, touch of bitterness (but went away after a day). Lovely taste when sweetened.

Add-ins: 1/4 tsp vanilla extract, 2 tsp raw wild-harvested honey or grade B maple syrup and pinch of fine ground sea salt.

Make it fancy: raw wild-harvested honey, a pinch of cayenne and fresh lime juice and a pinch of fine ground sea salt is delish. You can also enjoy it with fresh lemon juice, honey, vanilla extract and a pinch of fine ground sea salt.

Nutritional bennies: millet contains a range of beneficial phytochemicals (a.k.a. phytonutrients) and is known to reduce the incidence of stomach ulcers, protect against cardiovascular disease, diabetes and even help protect against childhood asthma.

– – –


Oats:
1/2 cup raw, gluten-free oats
2 cups pure water (use coconut water for extra sweetness and electrolytes)
No soaking

Steps: you can toast your oats (7-10 minutes at 350°F) or use them raw (no soaking). Blend together raw or toasted and strain through cheesecloth (you may want to strain twice). Serve chilled, room temp or warm.

Taste/consistency: oat-y but neutral enough, a bit starchy, fine grain texture. Makes a good base for add-ins like honey and cinnamon.

Add-ins: 1/4 tsp vanilla extract, 2 tsp raw wild-harvested honey or grade B maple syrup and pinch of fine ground sea salt.

Make it fancy: 1/4 tsp cinnamon, 1/4 tsp vanilla extract, raw honey and rosewater to taste. Or 1/4 tsp cinnamon, pinch cayenne, raw honey, 1/4 tsp vanilla extract and 2 tsp cocoa.

Nutritional bennies: a good source of fiber (soluble and insoluble), oats are also one of the best sources of compounds called tocotrienols. These are antioxidants which together with tocopherols form vitamin E. The tocotrienols inhibit cholesterol synthesis and have been found to lower blood cholesterol.

– – –


Pine Nuts:
1/2 cup raw pine nuts
2 cups pure water (use coconut water for extra sweetness and electrolytes)
No soaking

Steps: no need to soak pine nuts, but you can toast them (7 minutes at 350°F). Blend together raw or toasted, and strain through cheesecloth. Serve chilled.

Taste/consistency: beautiful white milk, creamy, buttery, pine-y and a smidge bitter. Delicious with sweetening and toasted.

Add-ins: 1/4 tsp vanilla extract, 2 tsp raw wild-harvested honey or grade B maple syrup and pinch of fine ground sea salt.

Make it fancy: add cardamom, honey, cinnamon and cocoa.

Nutritional bennies: pine nuts are a good source of iron, magnesium, potassium and protein. And they are the only source of pinoleic acid which helps stimulate hormones that suppress appetite. They are also protectors of the heart since they are high in oleic acid.

– – –


Poppy Seeds:
1/3 cup poppy seeds
2 cups pure water (use coconut water for extra sweetness and electrolytes)
Soak time: 4-5 hours

Steps: blend together and strain through cheesecloth—you will have to rinse soaked poppy seeds through a cheesecloth, too, since they are so tiny. Serve chilled, room temp or warm.

Taste/consistency: beautiful pale purple milk, creamy, light, fresh and delicious.

Add-ins: 1/4 tsp vanilla extract, 2 tsp raw wild-harvested honey or grade B maple syrup and pinch of fine ground sea salt.

Make it fancy: add cardamom and cocoa. Or orange zest, a bit of orange juice, honey and vanilla extract. Mixed berries blended in are also amazing.

Nutritional bennies: this milk is especially good for treating inflammation, joint pain and insomnia thanks to their beneficial amounts of magnesium and calcium.

– – –


Quinoa (KEEN-wah):
1/2 cup sprouted, toasted or cooked quinoa
2 cups pure water (use coconut water for extra sweetness and electrolytes)
Soak time: 8-12 hours

Steps: ideally, you will soak and either sprout, or cook quinoa for this milk. You can also toast it (7 minutes at 350°F). Blend together and strain through cheesecloth. Serve chilled, room temp or warm.

Taste/consistency: uncooked quinoa has a strong grassy flavor that is either loved or detested by those that try it. I prefer to sprout and then cook the grain for this milk because I lean towards the former. It’s worth a try though, because this milk is tasty with add-ins like maple syrup and cocoa.

Add-ins: 1/4 tsp vanilla extract, 2 tsp raw wild-harvested honey or grade B maple syrup and pinch of fine ground sea salt.

Make it fancy: add cardamom and cocoa. Mixed berries blended in are also tasty.

Nutritional bennies: quinoa—not as a grain, but a seed from the goosewort plant (cousin of spinach and chard)— is a complete protein source and also high in magnesium.

– – –


Sesame Seeds:
1/2 cup raw sesame seeds
2 cups pure water (use coconut water for extra sweetness and electrolytes)
Soak time: 6-8 hours

Steps: blend together soaked or toasted (7 minutes at 350°F) seeds and strain through cheesecloth. Serve chilled, room temp or warm.

Taste/consistency: delicious toasted sesame flavor, rich, creamy milk.

Add-ins: 1/4 tsp vanilla extract, 2 tsp raw wild-harvested honey or grade B maple syrup and pinch of fine ground sea salt.

Make it fancy: Add cardamom and cocoa. Or orange zest, a bit of orange juice, honey and vanilla extract. Mixed berries blended in are also amazing.

Nutritional bennies: not only are sesame seeds a very good source of manganese and copper, but they are also a good source of calcium, magnesium, iron, phosphorus, vitamin B1, zinc and dietary fiber.

– – –


Sunflower Seeds:
1/2 cup raw sunflower seeds
2 cups pure water (use coconut water for extra sweetness and electrolytes)
Soak time: 4-6 hours

Steps: you can toast seeds for extra flavor (7 minutes at 350°F). Blend together soaked or toasted and strain through cheesecloth. Serve chilled, room temp or warm.

Taste/consistency: fresh mildly green, floral (almost undetectable), creamy taste—like pure sunshine.

Add-ins: 1/4 tsp vanilla extract, 2 tsp raw wild-harvested honey or grade B maple syrup and pinch of fine ground sea salt.

Make it fancy: add cardamom and cocoa. Or orange zest, a bit of orange juice, honey and vanilla extract. Mixed berries blended in are also amazing.

Nutritional bennies: supplying significant amounts of vitamin E, magnesium and selenium, sunflower seeds are also loaded with phytosterols, which are compounds found in plants that have a chemical structure very similar to cholesterol. When present in the diet in sufficient amounts, phytosterols are believed to reduce blood levels of cholesterol, enhance the immune response and decrease risk of certain cancers.

– – –


Walnuts:
1/2 cup raw walnuts
2 cups pure water (use coconut water for extra sweetness and electrolytes)
Soak time: 8-12 hours

Steps: you can toast walnuts for extra flavor (7 minutes at 350°F). Blend together soaked or toasted and strain through cheesecloth. Serve chilled, room temp or warm.

Taste/consistency: earthy, very walnut-y flavor when toasted, creamy, subtle grit. Raw walnut milk is a bit more mild, but creamy and a pale, pale purple.

Add-ins: 1/4 tsp vanilla extract, 2 tsp raw wild-harvested honey or grade B maple syrup and pinch of fine ground sea salt.

Make it fancy: add cardamom and cocoa. Or orange zest, a bit of orange juice, honey and vanilla extract. Mixed berries blended in are also amazing.

Nutritional bennies: walnuts have more antioxidants—and better-quality antioxidants—than most popular nuts. They are loaded with vitamin E, they can lower cholesterol, reduce the oxidative stress caused by the free radicals, and decrease unhealthy inflammation. And listen up fellas, walnuts could improve sperm quality.

– – –


Pecans:
1/2 cup raw pecans
2 cups pure water (use coconut water for extra sweetness and electrolytes)
Soak time: 8-12 hours

Steps: you can toast pecans for extra flavor (7 minutes at 350°F). Blend together soaked or toasted and strain through cheesecloth. Serve chilled, room temp or warm. This is one of my favorite milks for cereal, smoothies and tea, especially in the winter months.

Taste/consistency: toasted is a rich, pecan-y flavor and raw is more mild—both are creamy and delicious.

Add-ins: 1/4 tsp vanilla extract, 2 tsp grade B maple syrup and pinch of fine ground sea salt.

Make it fancy: blend in maple syrup and cocoa for the best chocolate milk you ever had.

Nutritional bennies: a good source of protein and rich in vitamin E, pecans are a natural antioxidant (reducing risks of cancer and heart disease). They contain monounsaturated fatty acids, the type of heart-healthy fat (lowering bad LDL cholesterol and raising good HDL cholesterol), and pecans are also a good source of folic acid, niacin, magnesium, selenium and zinc.

– – –


Pumpkin Seeds:
1/2 cup raw pumpkin seeds
2 cups pure water (use coconut water for extra sweetness and electrolytes)
Soak time: 6-8 hours

Steps: you can toast pepitas (7 minutes at 350°F) for a more “popcorn-y” flavor. Blend together soaked or toasted and strain through cheesecloth. Serve chilled, room temp or warm.

Taste/consistency: toasted is unique, rich flavor while soaked is a bit more mild, but still uniquely pepita. Creamy, beautiful pale green milk.

Add-ins: 1/4 tsp vanilla extract, 2 tsp raw wild-harvested honey or grade B maple syrup and pinch of fine ground sea salt.

Make it fancy: Add cardamom and cocoa. Or orange zest, a bit of orange juice, lime juice, honey and vanilla extract. Delicious with just honey and lime, too.

Nutritional bennies: also known as “pepitas”, pumpkin seeds are an edible seed of a pumpkin or other cultivar of squash. They are a good source of essential fatty acids, protein and the essential minerals iron, zinc, manganese, magnesium, phosphorus, copper and potassium. The oil and seeds are used to treat enlarged prostate, Irritable Bowel Syndrome, Interstitial Cystitis and various digestive ailments. The high tryptophan content makes pepita of interest to researchers studying the treatment of anxiety disorders, too.

– – –


Nut & Seed Butters:
You can use 1 tbsp of nut/seed butter like pumpkin seed, almond, tahini or cashew per 1 cup water. Just blend, and most times, straining isn’t necessary.

– – –

Sweeteners to try:
Honey
Sucanat
Molasses
Maple Syrup
Brown Rice Syrup
Dates (blended with almond milk makes a great foam for Rooibos Chai Tea)

Add-ins to try:
Maca
Chia
Berries (blend in or just add juice)


Pomegranate juice
Lemon zest (blend)
Orange juice (try blood orange)
Orange zest (blend)
Lavender (blend)
Rosewater
Lemon juice (try Meyer lemon, too)
Lemon zest (blend)
Lime juice
Lime zest (blend)
Cinnamon
Cardamom
Nutmeg
Vanilla Bean or extract
Cocoa (serve warm for hot cocoa)


Cayenne
Turmeric
Fresh mint (blend)
Fresh thyme  (blend)
Chia seed (add post blend, they will plumpen like tapioca pearls)

Add-in combos to try on all:
Cocoa & Cayenne
Cocoa, Vanilla & Cayenne
Honey, Lemon & Lavender
Vanilla & Orange Juice
Vanilla & Rosewater
Vanilla, Cinnamon & Rosewater
Honey & Cayenne
Cinnamon, Vanilla & Cardamom
Cinnamon, Vanilla & Nutmeg
Vanilla & Strawberry
Vanilla & Raspberry
Vanilla, Lemon & Blackberry
Vanilla & Blueberry
Fresh Thyme & Mint
Rosemary, Lemon & Vanilla
Vanilla & Thyme
Vanilla, Strawberry & Basil
Vanilla, Blueberry & Thyme

What can YU do with leftover pulp?


Lots of lovely things…


Make a cereal:
1/2 cup pulp
2 tsp maple syrup
1 tsp unrefined coconut oil
1/8 tsp fine ground sea salt


Steps: just stir together all ingredients…


… and spread onto a parchment-lined cookie sheet.


You can take the rustic route and just spread cereal about 1/4″ high in no shape at all (and break with hands apart post-baking), or use a silicone spatula or knife to shape a rectangle.


Take the sculpting that much further by laying a knife into your cereal vertically…


… and then horizontally…


… to create pre-cut shapes that you can release once baked.


Bake at 350°F for 20 minutes, then flip and bake for another 10 minutes. I flip by placing a piece of parchment on top of baked cereal, then flip. You can also dehydrate for 6-8 hours, or until dry, to maintain more beneficial enzymes.

Add-ins: before baking, add 1 tbsp cocoa…


… for a chocolate-y cereal,


or add 1/4 tsp cinnamon and 1/8 tsp cardamom for a spiced cereal. Minced ginger is delicious with cardamom and orange zest, too. Just sayin’.

Fold-ins: add some gluten-free crisp brown rice, gluten-free oats, sprouted, dehydrated buckwheat and dried fruit like unsulphured blueberries, currants, cherries, cranberries, apples, strawberries, pineapple or mango for a healthy un-boxed cereal.

Store in an airtight glass container in the fridge. You will notice that you will become satisfied with a smaller bowl of cereal that you may be used to. This is because you are feeding your bod maximim nutrients, so it will say “I’m full” sooner than it would with a processed box cereal. These are delicious without milk, too. Add them to trail mixes, or munch on them plain.

Make a Chocolate Mousse:


1/2 cup pulp
1-2 tbsp non-dairy milk
2 tsp maple syrup
1 tbsp cocoa powder
1/8 tsp fine ground sea salt

Steps: just stir together all ingredients. For extra smoothness (you will need to make a larger batch), process in the food processor until you reach desired consistency.

Fold-ins: add some chia seed for beneficial EFAs, some fresh fruit for antioxidants or toasted nuts/seeds for crunch.

Store in an airtight glass container in the fridge.

Make Crackers:


1/2 cup pulp
1 tsp unrefined coconut oil
1/8 tsp fine ground sea salt

Steps: just stir together all ingredients and spread onto a parchment-lined cookie sheet. You can take the rustic route and just spread about 1/4″ high in no shape at all, or use a silicone spatula or knife to shape a rectangle. Lay a knife into your rectangle vertically and then horizontally to create pre-cut shapes that you can release once baked. No patience for that? Just break up with your hands post-baking.

Bake at 350°F for 20 minutes, then flip and bake for another 10 minutes. You can also dehydrate for 6-8 hours, or until dry, to maintain more beneficial enzymes.

Add-ins: before baking, add any combination of fresh, chopped thyme, sage, rosemary, basil, oregano, marjoram and/or lavendar. Try folding in 1/4 tsp minced garlic and/or 1 tsp onion. Or add some cumin and coriander.  Experiment and have fun.

Fold-ins: golden raisins and pecans (especially tasty with rosemary and/or thyme).

Crumble on top of salads for crunch and protein. Enjoy spread with a bit of unrefined coconut oil and a pinch of sea salt for a snack. Top with Cashew Cheese Spread—yum.

– – –

Storage: 
Store in recycled glass jars—just give ’em a shake before serving. All milks will keep for about 7-10 days if you don’t drink them up first.

– – –

Well, that should cover pretty much all of the bases. I hope YU all find this helpful and share it with others.

Rice Cleansing Diet

By Gloria Hedva Olson 28 March 2015
This diet will help you clean out your system after all the holiday food, parties and binges. Darling
The diet is based on rice, every three days adding a new food category, for instance, after the first three days of unsalted rice and clear pure lots of water, the addition of turmeric, cumin, parsley, fenugreek, spices, herbs, especially green, olive oil and lemon are all permissible after 3 days. So the “fast” is not so difficult.

This diet is contraindicated for people with constipation, diabetes (if out of control),
GREAT for high blood pressure, and GREAT for allergies and rhinitis.
1st 3 days: We eat only rice (brown recommended)., boiled in water, preferably with no salt, if necessary, then scant. Lemon is fine. Make sure to drink at least 8-10 glasses water daily.

After first 3 Days, may use spices such as turmeric, cumin, cinnamon, sweet paprika, muscat, ginger, also garlic and onion.
The 2nd 3 days: Add GREEN vegetables. Rice plus: cucumbers, lettuce, beet greens, baby leaves, spinach, parsley, coriander, fennel, celery, zucchini, green beans.
3rd Set of 3 days: Add ORANGE vegetables. Rice plus: Greens and Orange vegetables. Carrots, Butternut Squash, Pumpkin, Sweet Potato
4th set of three days: Add ROOT vegetables. Rice plus: Greens, Orange, Root vegetables (herbs and spices, olive oil, plenty of lemon juice before serving all along). Roots such as: Kohlrabi, Beets, Parsley root, Celery root.
5th set of three days: Rice, Green vegetables, Orange and Root vegetables, add Cereals such as: Buckwheat, Barley, Oatmeal, Millet (NOT Wheat).
6th set of three days: Rice plus LEGUMES/BEANS – All Kinds: Azouki, Choumus, Lentils, Mush, plus GREEN, ORANGE and ROOT Vegetables.
7th set of three days: Add, Seeds (Pumpkin, Sunflower, Sesame), Nuts (Almonds, Brazil, Cashews, Pecans, Walnuts), Fish 3X weekly.
Recipes and ideas for this 3-week, easy, Rice Cleansing Diet, to come (hopefully).
TOP

The Secret to Keeping Fruits and Vegetables Fresh Longer

Author: Seventh Generation 12 Feb 2014
When it comes to spending time together, fruits and vegetables are surprisingly human-like. It seems the real secret to keeping them at their freshest for as long as possible is simply knowing where they like to spend their time and which fruits and veggies get along best.
Fruits and vegetables give off an odorless, harmless and tasteless gas called ethylene after they’re picked. All fruits and vegetables produce it, but some foods produce it in greater quantities. When ethylene-producing foods are kept in close proximity with ethylene-sensitive foods, especially in a confined space (like a bag or drawer), the gas will speed up the ripening process of the other produce. Put spinach or kale in the same bin as peaches or apples, and the greens will turn yellow and limp in just a couple of days. [wpex Read more]
You can take advantage of this if you want to speed up the ripening process. Put an apple in a bag with an unripe avocado, or a peach in a closed paper bag with a ripe banana. But if you want your already-ripe foods to last longer, keep them away from ethylene-producing foods.

Store cold-sensitive fruits and veggies on the counter, not in the fridge since lose flavor and moisture at low temperatures. Once they’re fully ripe, you can refrigerate them to help them last, but for best flavor, return them to room temp. Never refrigerate potatoes, onions, winter squash or garlic. Keep them in a cool, dark, dry cabinet, and they can last up to a month or more. But separate them so their flavors and smells don’t migrate.

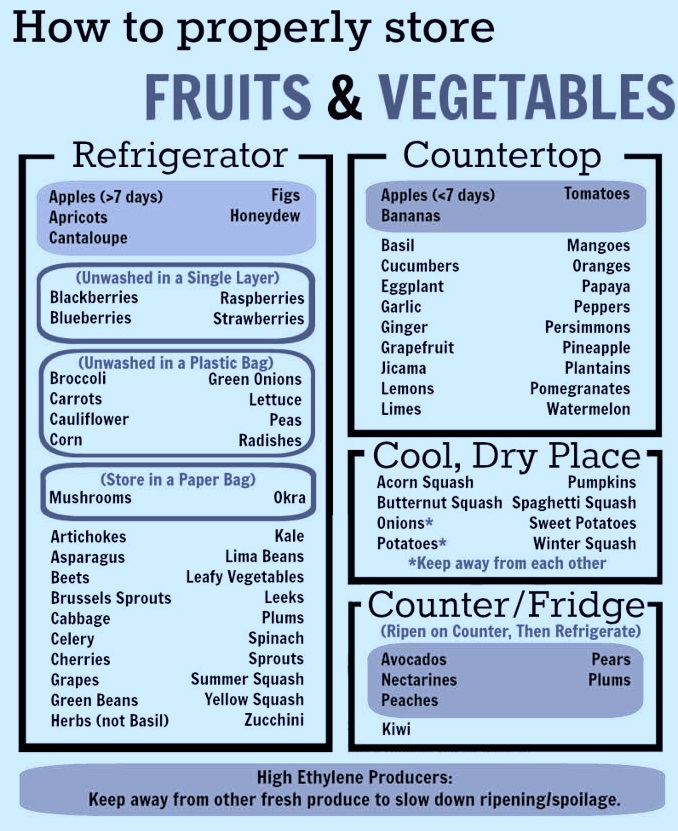
And remember: One bad apple really can spoil the whole bunch. Mold spreads rapidly and contaminates everything nearby, so toss any spoiled produce immediately. For longer life, keep your produce whole –don’t even rip the stem out of an apple until you eat it. We love how this quick-reference chart from sparkpeople.com puts it all in order.


How to store Fruits and Veggies

How to store Fruits and Veggies

TOP

With all the scandal in the press about Kraft Macaroni and Cheese Having GMO (genetically modified wheat etc.) I pulled out one of my favorites. If you want REAL Food with the same amount of time and half the price try:

Easy Stove Top Macaroni and Cheese

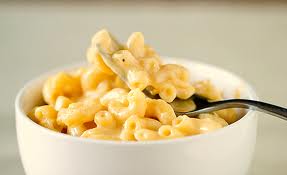
macaroni and cheese

macaroni and cheese

Total Time:30 mins
Prep Time:15 mins
Cook Time:15 mins
Auntie’s Note: An easy way to do macaroni and cheese when there is little time until dinner. No baking required.
Ingredients:Servings: 4

Osem Macaroni

Osem Macaroni

8 ounces elbow macaroni
1/4 cup butter
1/4 cup flour
1/2 teaspoon salt
1 dash black pepper
2 cups milk
2 cups cheddar cheese, shredded (8oz)
Directions:
1) Cook macaroni according to package directions.
2) In medium saucepan, melt butter over medium heat; stir in flour, salt and pepper; slowly add milk.
3) Cook and stir until bubbly.
4) Stir in cheese until melted.
5) Drain macaroni; add to cheese sauce; stir to coat.

NY Times Publishes Kraft Mac & Cheese Warning Label

What’s considered the most respected newspaper in the world today published the Kraft warning label that a Food Babe reader found in the UK on an imported US box of Kraft Macaroni & Cheese. I want to thank the NY Times for investigating and broadcasting this label to the world and millions of Americans in their newspaper and online for everyone to see. This is a huge victory in food awareness!
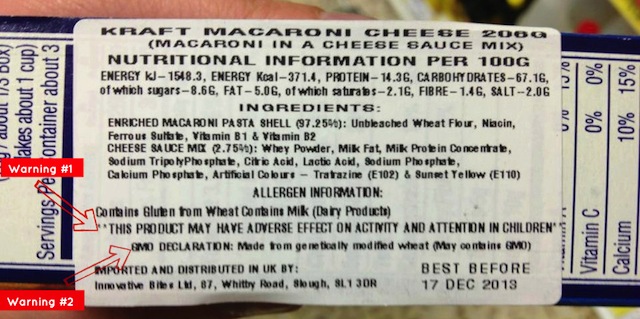
Given all the media coverage since March, it is now becoming blatantly apparent that there are serious concerns with the ingredients in Kraft Mac & Cheese. Everyone who reads the NY Times today will see the 2 warnings:
Warning #1: This Product May Cause Adverse Effects On Activity And Attention In Children (This warning label is required because The US version of Kraft Mac & Cheese has artificial food dyes yellow #5 and yellow #6 which are proven to be linked to hyperactivity in children.)
Warning #2: GMO Declaration: Made from genetically modified wheat. (May contain GMO) (This warning label is required because the US version of Kraft Mac & Cheese contains GMOs.)

="Warning #1: This Product May Cause Adverse Effects On Activity And Attention In Children (This warning label is required because The US version of Kraft Mac & Cheese has artificial food dyes yellow #5 and yellow #6 which are proven to be linked to hyperactivity in children.) Warning #2: GMO Declaration: Made from genetically modified wheat. (May contain GMO) (This warning label is required because the US version of Kraft Mac & Cheese contains GMOs.)

=”Warning #1: This Product May Cause Adverse Effects On Activity And Attention In Children (This warning label is required because The US version of Kraft Mac & Cheese has artificial food dyes yellow #5 and yellow #6 which are proven to be linked to hyperactivity in children.) Warning #2: GMO Declaration: Made from genetically modified wheat. (May contain GMO) (This warning label is required because the US version of Kraft Mac & Cheese contains GMOs.)

There was quite a bit of speculation about this label last week. Many people on the internet questioned if it was real and where it came from. According to the report in the NY Times, in video evidence I posted, and in two other videos here and here, we can now conclude the following:
The NY Times verified that this is in fact a real label on US Kraft Mac & Cheese sold in the UK.
We know that Kraft does not label, distribute or export the US version of Mac & Cheese officially. (To echo my quote in The NY Times, I find it extremely bizarre that Kraft had no knowledge of their products being sold and widely available in one of the largest retailers in the world (Tesco) and are trying to pass this off as a black market supply.)
Kraft has confirmed they do not use GMO wheat. (However, no one to my knowledge has tested the product to verify this 100%, which is important considering the contamination of GMO wheat in Oregon.)
Kraft customer service confirmed use of other GMOs in their products (see video evidence here).
Given all the public statements that Kraft has made to the media about this label so far – they have not attempted to refute one important fact – Their product “May Cause Adverse Effects On Activity And Attention In Children.” This is truth they can’t deny.
Tesco who sells the US version of Kraft Mac & Cheese in their “World Foods” section confirmed the label is placed on by the distributor – Innovative Bites.
The case is still not solved. THERE IS STILL A MAJOR QUESTION UNANSWERED. No one has been able to get in touch with distributor Innovative Bites (including me) to find out why they used the words “made with genetically modified wheat” on the label.
Lynne Galia, the spokeswoman I met at Kraft headquarters when I delivered thousands of signatures, has still not responded to me directly. She will not answer my emails or my phone calls. She will gladly talk to the NY Times and other news agencies, but not to me or the other 290,000 people I represent who signed a petition asking Kraft to remove artificial food dyes. I find it bizarre that Kraft wouldn’t genuinely want to answer basic questions about their product – especially after I posted this concerning information that could have health implications to millions of people and children.
How can we continue to trust a company like Kraft that is more concerned about making greedy business decisions to keep their market share and paying their executives millions of more dollars year after year, while neglecting enormous public outcry regarding their flagship product?
How can we continue to trust a company that continues to not take responsibility for their product containing petroleum based dyes and GMOs?
How can we continue to trust an American company that reformulates their products without harmful ingredients to our friends overseas but not to us?

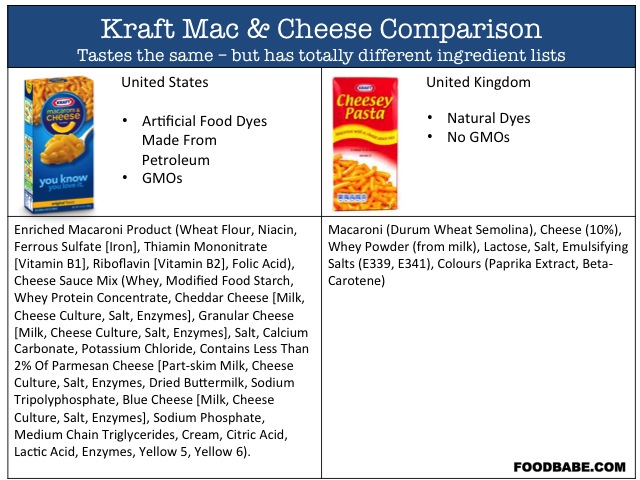
Kraft Mac and cheese ingredients

Kraft Mac and cheese ingredientsI want to leave you with a clarification note I received from Flo (who is definitely a hero for finding this label!) She would like to share her unedited thoughts about Kraft Mac & Cheese here:
I’ve been eating Kraft Macaroni and Cheese for a long time now and have grown to enjoy the product, much like many others I’m sure. However with these recent discoveries of the yellow dyes and their effects as well as the GM wheat and GMOs, I’ve become very concerned. I have continued to eat Kraft macaroni and cheese in moderation knowing the effects it may have, however I’m certainly considering stopping if the ingredients aren’t changed. I’m worried about the long term effects it may have and really hope that Kraft can find a way to alter the ingredients, making them safer and healthier, without it having an effect on the taste of the product. Mainly, I’m concerned that children around the world may be eating this without knowing the effects it could have. Also, I would like to thank the New York Times for publishing the photo and not dismissing it as fake. ~ Flo Wrightson Cross
Source: foodbabe.com
TOP

How to Cook a Frozen Fish that’s too big Darling

by Auntie Nosebag

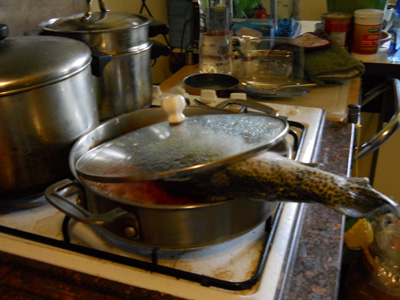
First wash the fish and then try to put the fish in the middle, face down and then face up – tail down. Eventually it defrosted and bent and then when soft I cut the head and tail off and was able to continue cooking it in small amount of oil with paprika, cumin, caraway seeds and a splash of tomato paste in the pot. It cooked and tasted great, I also placed gefilta fish in the extra sauce and that came out good as well. Better than just out of the jar.

Why does the US government need 30,000 Guillotines and over 600 Million rounds of hollow point bullets?

If you don’t have one of these, try…

First wash the fish and then try to put the fish in the middle, face down and then face up – tail down.

First wash the fish and then try to put the fish in the middle, face down and then face up – tail down.

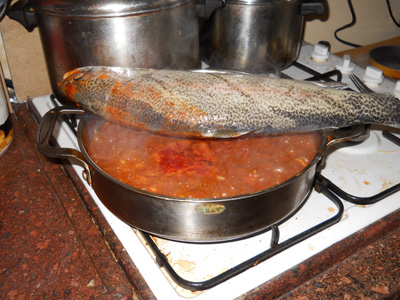
How to Cook a Frozen Fish-02 Put the fish in the middle, face down and then face up – tail down.

Put the fish in the middle, face down and then face up – tail down.

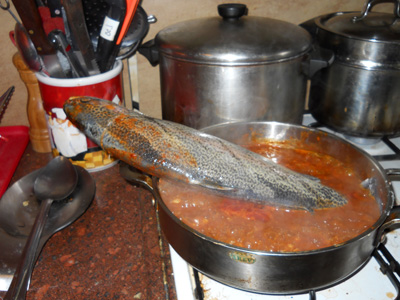
How to Cook a Frozen Fish - 03 Put the fish tail in the pot then the head to defrost it.

Put the fish tail in the pot then the head to defrost it.

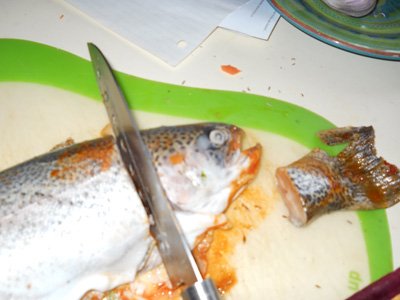
How to Cook a Frozen Fish - 04 Eventually it defrosted and bent and then when soft I cut the head and tail off

Eventually it defrosted and bent and then when soft I cut the head and tail off

How to Cook a Frozen Fish - 05 With the Head and tail cut off you can now fit the fish in the pot.

With the Head and tail cut off you can now fit the fish in the pot.

TOP

Israeli Breakfasts – Don’t Skip that Morning Meal: Shakshouka:

Shakshouka:”This Tunisian and Israeli dish is like a Mediterranean version of huevos rancheros. Fried eggs simmer in a sauce of tomatoes, onions, colorful bell peppers, chile peppers, and spices.”

Israeli Breakfast: Shakshouka, from the Hebrew word leshakshek meaning “to shake”, is a popular, spiced, egg and tomato dish.

Israeli Breakfast: Shakshouka, from the Hebrew word leshakshek meaning “to shake”, is a popular, spiced, egg and tomato dish.

Ingredients:
3 tablespoons olive oil
1 1/3 cups chopped onion
1 cup thinly sliced bell peppers, any color
2 cloves garlic, minced, or to taste
2 1/2 cups chopped tomatoes1 teaspoon ground cumin
1 teaspoon paprika
1 teaspoon salt
1 hot chile pepper, seeded and finely
chopped, or to taste
4 eggs
Directions:
1. Heat the olive oil in a skillet over medium heat. Stir in the onion, bell peppers, and garlic; cook and stir until the vegetables have softened and the onion has turned translucent, about 5 minutes.
2. Combine the tomatoes, cumin, paprika, salt, and chile pepper into a bowl and mix briefly. Pour the tomato mixture into the skillet, and stir to combine.
3. Simmer, uncovered, until the tomato juices have cooked off, about 10 minutes. Make four indentations in the tomato mixture for the eggs. Crack the eggs into the indentations. Cover the skillet and let the eggs cook until they’re firm but not dry, about 5 minutes.
ALL RIGHTS RESERVED © 2013 Allrecipes.com Printed from Allrecipes.com 5/1/2013
TOP

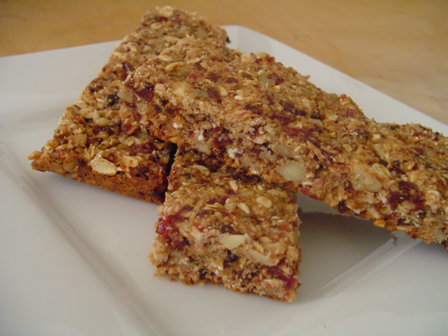
Auntie Nosebag goes Crackers & How To Make Your Own Emergency Survival Bars

naturalnews-com-logo

Survival food: How to make nutrition bars for the stockpile

June 22, 2020 by: https://www.naturalnews.com/2020-06-22-how-to-make-nutrition-bars-stockpile.html
(Natural News) Shelf-stable foods are an essential component of a prepper’s stockpile for disasters and SHTF situations. That said, most of the commercial, shelf-stable foods like granola bars, instant oatmeal and refined cereals are often a lot less nutritious than fresh, perishable foods.
But this doesn’t mean that a prepper should sacrifice nutrition for shelf life in filling up pantries. Reaching a middle ground is possible, and it comes in the form of homemade nutrition bars meant to last for months. (h/t to AskAPrepper.com)

Essential ingredients of nutrition bars

It’s no surprise that nutrition bars boast an incredible nutrition profile. Rich in fiber, minerals, protein and potent plant compounds, nutrition bars can be a godsend in times of need.
But there’s a problem: the nutrition bars found in store aisles are often full of calories, added sugar and artificial ingredients meant to increase their shelf-life and enhance their composition. In essence, eating these processed nutrition bars is no different from eating scoopfuls of plain sugar and chemicals.
But if made using the right ingredients, a nutrition bar becomes an essential part of a prepper’s stockpile. Here are some of the non-negotiable components of a decent nutrition bar:
Calories
The best nutrition bars are designed to be consumed in place of an entire meal, so it’s important that the bar has enough calories equal to a standard dish for lunch or dinner.
Protein
Meat shortages can happen in an SHTF situation, and plant-based meat substitutes like beans don’t contain complete proteins. For these reasons, protein-rich nutrition bars are a must.
Fiber
Fiber softens stool and promotes the proliferation of bacteria that aid digestion. But in most cases, processed nutrition bars fall short on the actual nutrition due to their lack of fiber.
Fat
Unsaturated fats are also an essential component of a good nutrition bar. Our bodies need these healthier fats for nutrient absorption and hormone production, among other cellular processes. (Related: Boost good cholesterol with monounsaturated fats.)
Vitamins and minerals
It’s not a nutrition bar without a decent amount of vitamins and minerals. In fact, a good nutrition bar should contain at least a third of the recommended intake for vitamins C, E, D and A, and essential minerals such as potassium, magnesium, calcium and zinc.

Simple nutrition bar recipe

Making nutrition bars is easier than most people think, and it doesn’t cost a fortune either. Here is a quick and simple recipe for a nutrition bar that ticks all the essential components listed earlier:
Ingredients:

  • 1/4 cup sunflower seeds
  • 1/4 cup chopped almonds
  • 1/4 cup dried cranberries
  • 2 cups oats
  • 1/2 cup honey
  • 1 cup almond butter
  • 2 tablespoons coconut oil
  • 1 tablespoon turmeric powder
  • 1/2 teaspoon salt
  • 1 scoop plant-based protein powder

Preparation:

  1. Preheat the oven to 300 C.
  2. In a large bowl, combine the sunflower seeds, chopped almonds, dried cranberries, oats, turmeric and protein powder.
  3. In a small saucepan, mix the wet ingredients and heat it up until it is light enough to pour.
  4. Pour the mixture over the mixed ingredients from earlier. Make sure all of the ingredients are coated.
  5. Spread the mix on a baking dish.
  6. Bake for 30 minutes.
  7. Once the mix has cooled, cut it into bars or squares for easier storage.
  8. Slip the bars into resealable plastic bags. You can seal each bar in a separate bag or seal a bunch of them in one bag.
  9. Label the bags.
  10. To increase the bars’ shelf life, store the resealable bags holding the bars in an airtight container.

Don’t like some of the ingredients listed? No problem. The recipe is meant to be a starting point for creating a decent enough nutrition bar, so don’t be afraid to change it up and add more ingredients or skip the others.
Read more articles about preparing your own shelf-stable foods at FoodStorage.news.
Sources include:
AskAPrepper.com
Foodtrients.com

wildernessarena-com-logo

Easy recipe for healthy, high calorie Survival Food Bars

June 3, 2013 https://www.wildernessarena.com/food-water-shelter/food-food-water-shelter/food-preparation/recipe-healthy-high-calorie-survival-food-bars
Here’s a treat for survivalists, backpackers, hikers, or anyone else looking for a dense, high-calorie food source that is non-perishable, easy to transport, and healthy. These “survival bars” can be cut into 2 inch by 2 inch squares and provide approximately 600 calories, 10 grams of fat, 25 grams of protein, and 40 grams of carbohydrates per bar.
This recipe will require the following ingredients:

  • Flax seed (3 tablespoons)
  • Frosted Flakes (1 cup)
  • Oatmeal (3 cups)
  • Protein powder (1 cup)
  • Peanut butter (2 tablespoons)
  • Olive oil (3 tablespoons)
  • Maple syrup (2 cups)
  • Honey (4 teaspoons)
  • Peanuts (1 cup)
  • Raisins (1 cup)

Step 1

Heat the syrup, honey, and olive oil in a saucepan over low heat, stirring every 60 seconds to keep the mixture from burning and/or forming a crust on top.

Step 2

Add 2 tablespoons of peanut butter and continue to stir until the peanut butter has melted.

Step 3

In a separate bowl, mix 3 tablespoons of flax seed, 1 cup of frosted flakes, 3 cups of oatmeal, 1 cup of protein powder, 1 cup of peanuts, and 1 cup of raisins. Mix thoroughly.

Step 4

Pour liquid mixture into bowl an stir until all dry ingredients are thoroughly coated.

Step 5

Pour mixture into flat baking pan and bake at 375 degrees for 20 minutes or until top begins to brown.

Step 6

Cut into 2 x 2 inch squares. Freeze and place in vacuum seal bags.
Four squares will provide 2,4000 calories, enough calories for a full day of hiking.

How To Make Your Own Emergency Survival Bars

July 09th 2012 http://blog.emergencyoutdoors.com/how-to-make-your-own-emergency-survival-bars/

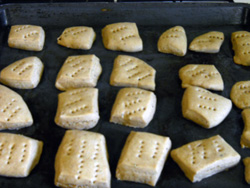
Auntie Nosebag goes Crackers

Ingredients Instructions
Auntie Nosebag goes Crackers
  • 4 cups flour
  • 1 tsp. baking soda
  • ¼ cup sugar
  • 1 Tb. salt (to taste)
  • ½ cup oil
  • 1 tsp. vinegar
  • 1 egg
  • 1 cup milk (I use rice milk)
  • 1 tsp. basil
  • sprinkle of thyme
  • 1 Tb. water
  • 1 Tb. oil (for bottom of the bowl)
Mix the dry ingredients in a big bowl. Mix wet ingredients in a smaller bowl.
Then stir in the wet ingredients with the dry and roll it into a dough, kneed it nicely and then put inside oiled bowl, cover and place in warm place to rest for about an hour. Kneed dough and roll out into squares. Place on greased cookie sheet at 350 degrees or 170 C, and cook for about 10 to 15 minutes.
And you have gone crackers!

Emergency Survival Bar

Ingredients Instructions

Emergency Survival Bar

  • 3 C. cereal (oatmeal, cornmeal, or wheat flakes)
  • 1/4 tsp. salt
  • 3 T. honey
  • 2 1/2 C. powdered milk
  • 1 C. sugar
  • 1/2 C. Jello (optional)
  • 1/4 C. water
  • add raisons if you like
Place all dry ingredients except Jello in a bowl. Bring water, honey, and Jello to a boil. Add to dry ingredients. Mix well. Add water a little at a time until mixture is just moist enough to mold. Place in a small square dish and dry in the oven under very low heat. Wrap and store. This will make 2 bars, each containing approx. 1000 calories or enough food for one day. These will store for a long time if they are cooked until quite dry, and are excellent for emergency packs, etc. Eat dry, or cooked in about 3/4 C. water

High Energy Survival Bars

Ingredients Directions
High Energy Survival Bars
  • 2 lbs pitted dates
  • 2 lbs figs
  • 2 lbs raisins
  • 2 cups cashew pieces
  • 2 cups sesame seeds
  • 2 cups peanut butter
1. Mix all ingredients except for peanut butter through a meat grinder.
2. Add peanut butter and mix well.
3. Roll out into 1/2 inch thick sheets.
4. Cut into bars and wrap well.Makes 60 2 ounce bars
Homemade Survival Energy Bars This homemade energy bar recipe is chock full of goodies and will sustain even the most exhausted trekker through the trip home. Wrap them individually and make extras for tucking into BOB (Bug Out Bags) or GHB (Get Home Bags) backpacks.
Ingredients Directions
  • 1 egg
  • 1/2 cup brown sugar
  • l tsp. vanilla extract
  • l cup granola
  • 1/2 cup raisins (or any chopped dried fruit)
  • 1/2 cup chopped hazelnuts (or your favorite nut)
  • 1 1.69 oz. pkg. M&M’s chocolate candies (or you can substitute carob chips)
Preheat the oven to 350 degrees. Generously butter or oil an 8 x 8 inch square pan (preferably nonstick). Crack the egg into a medium sized bowl. Add the sugar and vanilla extract and mix thoroughly. Stir in the granola, raisins, hazelnuts and M&M’s and mix until combined. The M&M’s can be replaced with carob chips,which will cut down on the sugar content.Transfer to the pan and distribute evenly over the bottom, pressing firmly with your hands. Bake for 25 minutes. Cool and cut into bars or squares. Serves 8 to 12.The trick here is to let the homemade energy bar cool!
TOP

High Calorie Protein bars

Submitted by: NATURENUT1233 https://recipes.sparkpeople.com/recipe-detail.asp?recipe=2645049

Introduction

Made to fill you up and give you lots of nutrition at the same time. Grab a couple bars on the go when you have to miss a meal, or use as a snack to help keep your weight up if exercising a lot, pregnant or nursing, or otherwise find it hard to keep on weight. Feel free to alter the recipe to suit your needs.
Minutes to Prepare: 15
Minutes to Cook: 20
Number of Servings: 20

Ingredients

5 C quick oats (dry)
1 C ground flax seed meal
1 C walnut halves and pieces
5 Tbl honey
1 C dark chocolate chips
4 large eggs
2 C mashed bananas
2 C vanilla soymilk
1 tsp sea salt
1 C creamy peanut butter (all natural)
1 Tbl Cinnamon (ground)
1/3 C Extra Virgin Olive Oil

Nutritional Info

  • Servings Per Recipe: 20
  • Amount Per Serving
  • Calories: 356.8

  • Total Fat: 21.5 g
  • Cholesterol: 0.0 mg
  • Sodium: 183.3 mg
  • Total Carbs: 36.2 g
  • Dietary Fiber: 6.5 g
  • Protein: 9.0 g

Tips

Aren’t the best tasting recipe but designed to be filling and provide lots of omega 3’s, protein, and calories along with other nutrient dense ingredients. You can also make these into cookies or muffins if you prefer instead of making bars. After 15 mins of baking you can turn off the oven and just leave them in the oven until they reach desired hardness as well.

Directions

Preheat oven to 350. Grease two baking sheets with some of the olive oil and then put the remainder in the dough. Mix all moist ingredients and all dry ingredients separately then combine. Put half of the dough on one cookie sheet and press it flat to fill one half side of the pan. Do the same with the other sheet and remainder of dough. Bake at 350 for 10 – 15 mins and cut apart into bars. Space apart on cookie sheets and bake until they reach desired hardness. Store in freezer and use as a quick meal or to help maintain / gain weight from time to time.
Serving Size: Makes 20 2 inch by 4 inch bars
Number of Servings: 20
Recipe submitted by SparkPeople user NATURENUT1233.

Recipe for Making Your Own Emergency Rations

May 14, 2012 SHTF Gear https://youtu.be/dSLi-n_JPRo
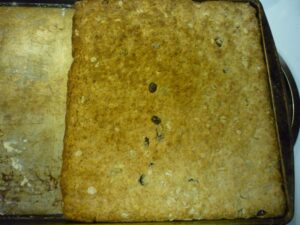
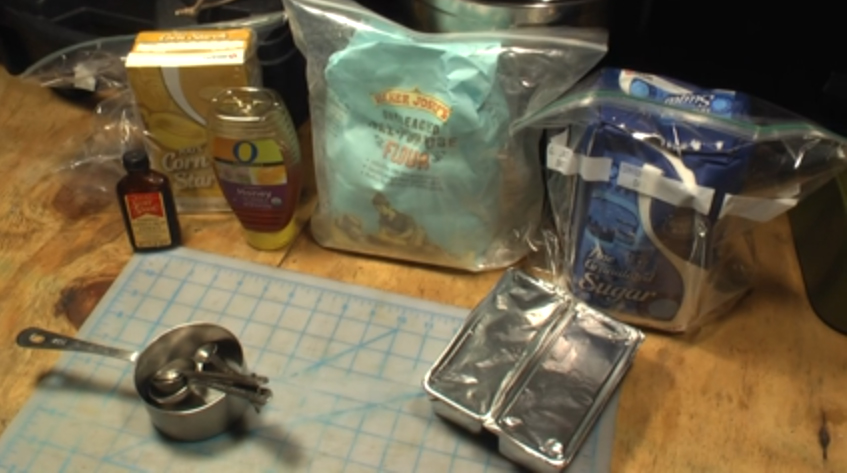
Here is a recipe of how to make your own emergency rations for your car, home, bug-out bag or any other place where you might need emergency food rations. Using all shelf stable ingredients, this recipe makes light-weight, high-calorie rations that last 5 years without refridgeration. What your basic recipe is an unleavened shortbread cookie.
This recipe makes 3 lbs and 12 ozs of uncook dough with 8,651 total calories. That makes about 20 – 3 ozs bars of rations with over 430 calories each. You can play with this recipe by adding other ingredients like nuts, dried fruit or peanut butter but make sure you do not use anything that can become rancid. Good luck.

Easy-Peezy High Calorie Survival Bars

Easy-Peezy High Calorie Survival Bars

Ingredients

You will need
All-purpose Flour – 4 cups (1600 kcal)
Vegetable Shortening – 2 cups (3776 kcal)
Sugar – 2 cups (1548 kcal)
Cornstarch – 1 cup (488 kcal)
Honey – 1 cup (1031 kcal)
Vanilla Extract – 4 tbsp (208 kcal)
Ground Flax seed (optional)
Peanut Butter (optional)
Peanuts (optional)
Raisins, dried fruit or Pitted Dates (optional)

Emergency Rations Ingredients

Emergency Rations Ingredients


Directions

Step 1: Combine Dry Ingredients

In A Large Bowl: Add 4 Cups of Flour, 2 Cups of Sugar, 1 Cup of Corn starch, add Vegetable Shortening and Honey together in the bowl then flavoring. Add optional ingredients.

Step 2: Mix

Combine your Ingredients
A couple suggestions:
1) If you melt the shortening and warm the honey, it will be easier to mix and handle the dough. I would heat up the shortening then mix in the honey before adding the dry ingredients.
2) Coconut oil does have a very long shelf life. Maybe not as long as veg shortening, but may be worth trying out for flavor and nutrition. “Extra virgin” tastes like coconut while “refined” does not.

Step 3: Combine and Bake

Dump mixture onto hard surface and begin to knead like bread dough then make a Dough ball.
Use parchment paper
Press into 1 inch deep cookie sheet or baking pan.
Preheat oven to 350 degrees.

Bake @ 350 degrees for 25 minutes or until golden brown.

Step 4: Storage

Cut into 2 inch x 2 inch squares
Let cool then pack in Vacuum seal bags.
Place 6 squares each into 3 vacuum seal bags for a total of 18 20 – 3 ozs bars of rations with over 430 calories each squares
If you are planning a camping trip, plan and pack at least 2400 calories per day)
Having had extensive experience with MRE-type bags, I can tell you that four things matter:
1) Different, randomly mixed good flavours.
2) Potassium- magnesium and sodium salt content, you have no idea how many people die from salt imbalance during these situations.
3)”Surprise of the day”. Throw random candy into each bag along with the bar. Moral is key for survival.
4)Over-estimate calorie intake. An MRE bag for a soldier with low activity level contains 2800 kcal. Bags for physically active soldiers (for a survuvalist: someone trying to get out of a danger area) contains around 4000 kcal.

Healthy Brownie Granola Bars

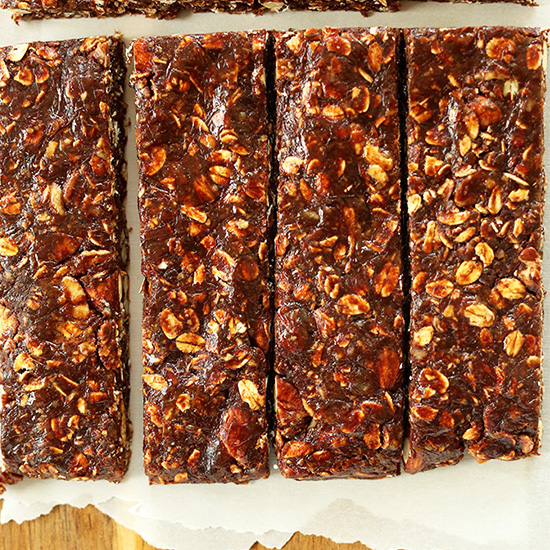
7-ingredient granola bars that taste just like a raw brownie! No baking required besides toasting the nuts and oats – an optional step. Simple, all naturally-sweetened and so delicious.

Author:

Brownie Granola Bars SQUARE

Brownie Granola Bars

Minimalist Baker-https://minimalistbaker.com/healthy-brownie-granola-bars/

Prep Time 30 minutes

Cook Time 15 minutes
Total Time 45 minutes

Servings: 12 (bars)

Category: Breakfast, Dessert, Snack
Cuisine: Gluten-Free, Vegan
Freezer Friendly 1 month
Does it keep? 7 Days

Ingredients

  • 1 1/2 cups rolled oats (GF for gluten-free eaters)
  • 1 cup raw nuts (roughly chopped // I used half almonds, half pecans)
  • 1 cup raw walnuts
  • 2 cups pitted dates (soaked for 10 minutes in warm water then drained)
  • 3/4 cup cocoa or cacao powder
  • 1/4 cup natural salted almond butter (or peanut butter)
  • 1/4 cup agave nectar or maple syrup (or honey if not vegan)

Instructions

  1. Optional step: Toast your oats and pecans in a 350-degree F (176 C) oven for 15 minutes or until slightly golden brown. Otherwise, leave them raw – I prefer the toasted flavor.
  2. Process walnuts in a food processor until a loose meal is reached. Remove from bowl and set aside.
  3. Add dates and process until small bits remain (about 1 minute). It should form a “dough” like consistency. (Mine rolled into a ball).
  4. Add walnut meal and cocoa or cacao powder back in with the dates and process to combine.
  5. Transfer mixture to a large mixing bowl and add the (toasted) oats and nuts and stir to combine. You may have to use your hands to really incorporate the mixture well.
  6. Next, warm honey and almond butter in a small skillet over medium heat for 2-3 minutes until combined and pourable. Pour over brownie mixture and then thoroughly stir using a wooden spoon. (I opted to put plastic bags on my hands and mix that way to better incorporate the mixture.)
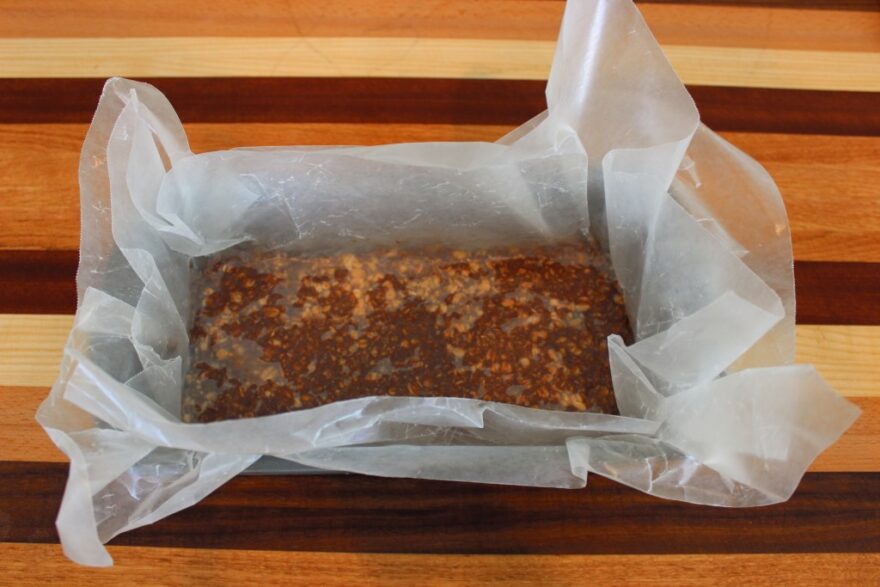
  7. Once thoroughly mixed, transfer to a 9×13 dish (or similar size pan // adjust if altering batch size) lined with plastic wrap or parchment paper so they lift out easily.
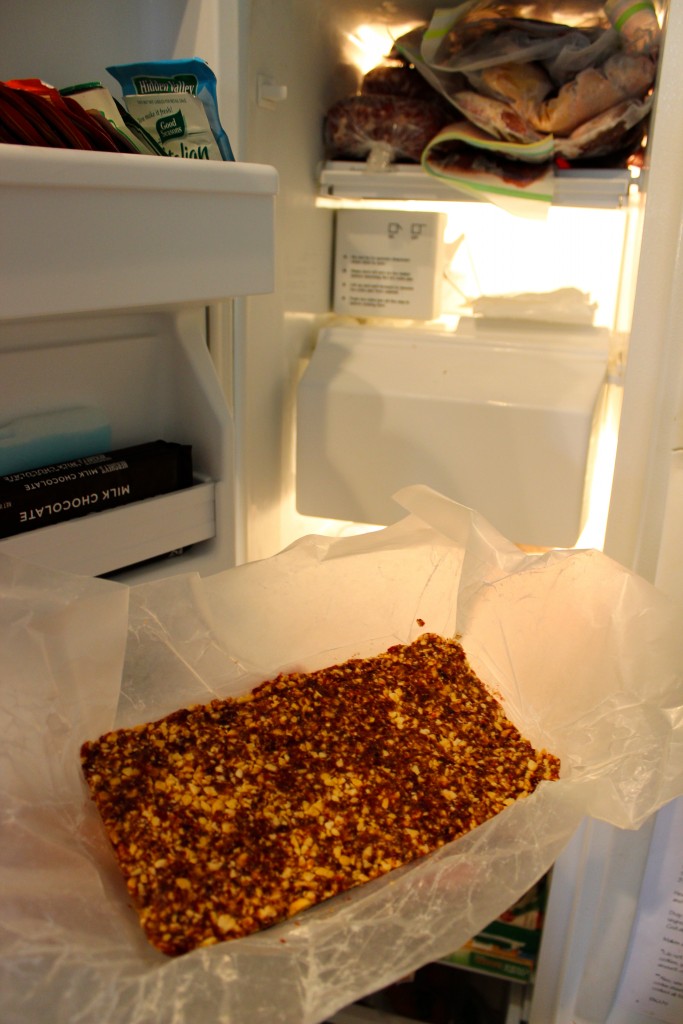
  8. If using a 9×13, ONLY USE 3/4 of the pan so they have the proper thickness. Otherwise they’ll be too thin. Cover with parchment or plastic wrap and press down firmly to even out the top. Freeze for 15-20 minutes to harden.
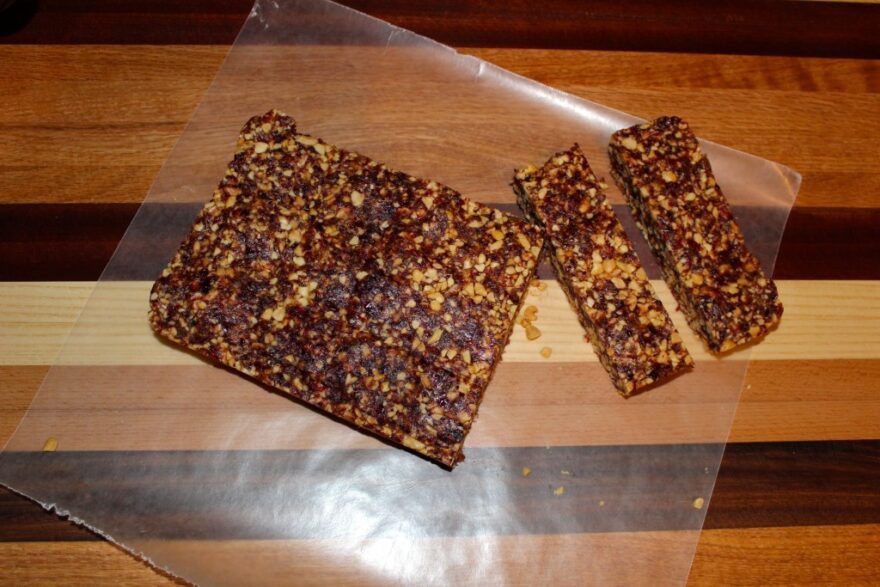
  9. Lift bars from pan and chop into 12 even bars (or more if you prefer). Store in an airtight container in the freezer or fridge to keep them extra fresh. They will get a little sticky when left out at room temp.

Notes

*Adapted from my 5-Ingredient Granola Bars and 5-Minute Espresso Walnut Brownies
*Nutrition information is a rough estimate.

Nutrition Per Serving (1 of 12 bars)

  • Calories: 352
  • Fat: 20g
  • Saturated fat: 2.2g
  • Sodium: 3mg
  • Carbohydrates: 41g
  • Fiber: 7.4g
  • Sugar: 25g
  • Protein: 8.2g

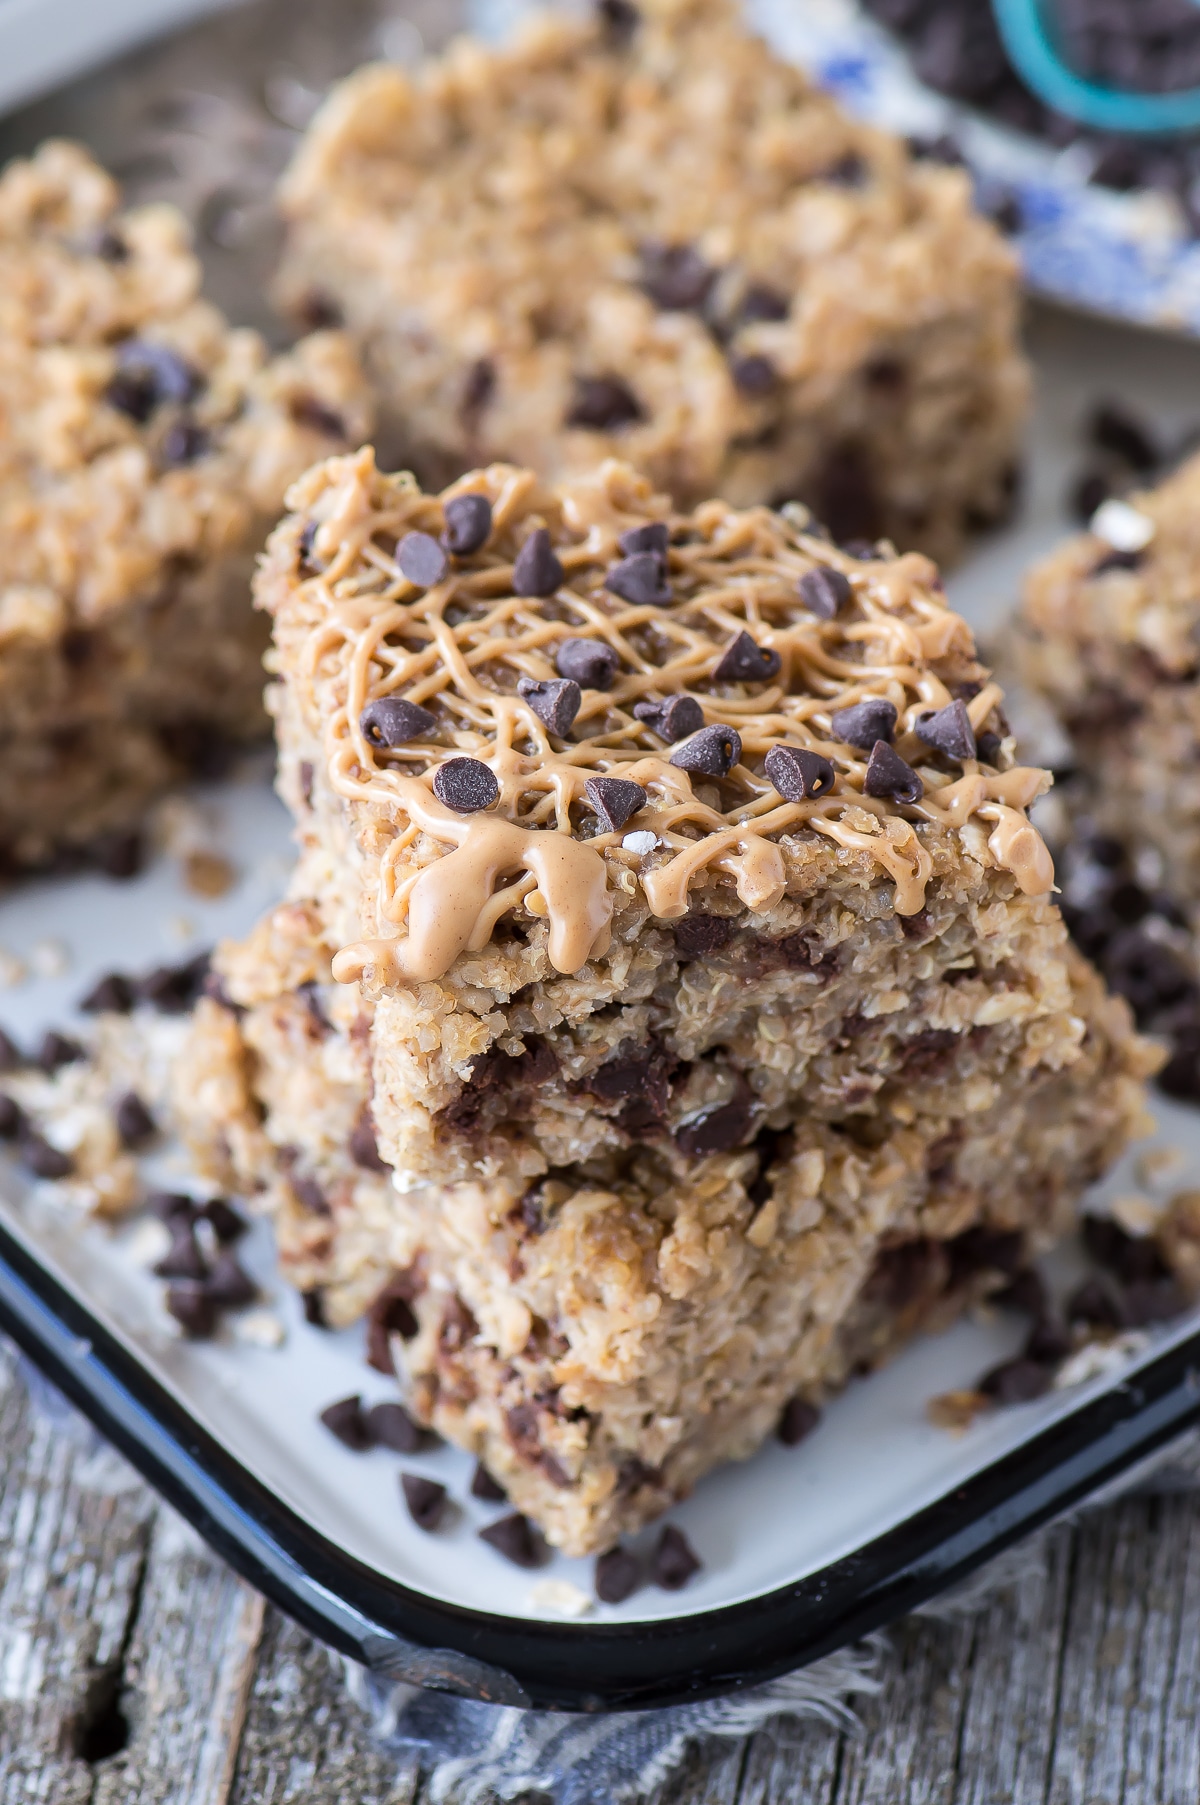
Healthy Peanut Butter Chocolate Chip Quinoa Bars

posted by Beth @ The First Year on April 6, 2016
Healthy peanut butter chocolate chip quinoa granola bars! 7 ingredients and 30 minutes to bake! The best homemade granola bar! https://thefirstyearblog.com/healthy-peanut-butter-chocolate-chip-quinoa-bars/
Yield: 8 inch pan

Quinoa Bars

Quinoa Bars

Total Time: 50 minutes

Ingredients:

  • 3 cups cooked quinoa (equal to 1 cup uncooked quinoa)
  • 2 & 1/2 cups rolled oats
  • 3/4 cup chocolate chips (I like minis!)
  • 1/4 cup flaxseed
  • 3/4 cup creamy peanut butter (can use all natural)
  • 3/4 cup milk
  • 1/4 cup honey

Directions:

  1. Cook the quinoa according to the directions on the package (takes about 15-20 minutes). You’ll need 2 cups of water for 1 cup of uncooked quinoa. Allow it to cool before moving forward.
  2. Preheat the oven to 350 degrees F.
  3. Combine the cooked & cooled quinoa, oats, chocolate chips, and flaxseed in a bowl and mix to combine.
  4. Add in the peanut butter, milk, and honey and stir to combine. *TIP* Spray the 1/4 cup with non-stick cooking spray before measuring the honey, it will ensure that it doesn’t stick to the cup.
  5. Spray an 8×8 inch baking pan with non-stick cooking spray. Transfer the quinoa mixture to the baking pan and distribute evenly with a spatula.
  6. Bake for 21-26 minutes. Remove the pan from the oven and allow the bars to cool. Cut and store in an airtight container in the fridge.

oneingredientchef-com-logo

Tarahumara Pinole Energy Bars

by 6April2013, https://www.oneingredientchef.com/tarahumara-pinole-energy-bars/
Pinol-e-what?!
In the book Born to Run, Christopher McDougall talks about the legendary Tarahumara tribe in Mexico who regularly run 50 miles or more per day. How can they accomplish such a feat? Their diet certainly plays an important role, and a secret magical food called “pinole” is one of their staples. Pinole is so simple: it’s basically toasted cornmeal mixed with natural sugar, spices, and water. It can be eaten as a porridge, or baked into a cake so that you can take it with you while running.
Now… I don’t run 50 miles a day (ha!) but once I started experimenting with this pinole nonsense, I realized why the Tarahumara rely on it so much: it’s the perfect source of energy. When I eat a pinole energy bar before running, I have more endurance, my blood sugar seems to stay more stable, and I recover quicker. These cakes are the most natural and easily digestible source of energy that I’ve ever eaten while working out.
The problem is… there are virtually no good recipes for pinole. The ones online aren’t very tasty or just don’t work well. I have spent a long time coming up with the right ingredients and the right quantities. The recipe I’m about to share with you is so delicious and it holds together well enough to throw in your pocket for the second half of those 50 mile runs. 🙂 I’m confident it’s one of the best pinole recipes you’ll find.
But what about taste? Amazing. But almost impossible to describe. It’s not quite cornbread… not quite a cookie… not quite an energy bar… but a delicious combination of all three. Super magical powers aside, these energy bars have become one of my all-time favorite foods and I eat them almost every day.

Pinole
Makes 3 energy “cakes”

Ingredients:

  • 1 cup masa harina (cornmeal treated with lime
  • 1/4 cup chopped dates
  • 2/3 cup water
  • 3 tablespoons brown rice syrup
  • 2 tablespoons chia seeds
  • dash cinnamon

Step One


Pinole - Step One Preparation

Pinole – Step One Preparation

Preheat the oven to 350ºF.
Then, start toasting the cornmeal and chia seeds. Add both ingredients to a skillet and toast over medium-high heat for 5-8 minutes. This step is essential, but can be tricky: If the heat is too low, the cornmeal won’t toast. If the heat is too high, it will burn. Keep a constant eye on it and stir regularly.
Note: Masa harina is cornmeal treated with lime (the mineral lime, not the fruit). If you cannot find masa harina, feel free to use regular cornmeal – it won’t make a huge difference.

Step Two


Pinole - Step Two- Add all the ingredients

Pinole – Step Two- Add all the ingredients

Add all the ingredients to a food processor and pulse until there are no large chunks of dates remaining. If the mixture is too crumbly, add a little more water until you’re left with a thick paste.
You CAN use other sweeteners. I’m sure agave is more “traditional” to the Mexican region, but I’ve tried them all in this recipe and brown rice syrup has no substitute in my opinion. It really helps hold the cakes together and adds just the right amount of sweetness.

Step Three


Pinole - Step Three - Form the mixture

Pinole – Step Three – Form the mixture

Form the mixture into 3 rounds, about 3/8 inch thick and 5 inches in diameter. Bake on a nonstick tray for about 10-12 minutes until the outside forms a solid crust and begins to show small cracks. Remove from the oven and let cool. They can be eaten immediately or saved in the refrigerator for several days.
I like to cut these into half moons and eat half before I go running and the other when I get back. Or, if it’s a long workout, I’ll take the other half (in plastic wrap) with me and eat it along the way. When eating them at home, I highly recommend topping with peanut butter for some extra awesomeness.

Pinole

Pinole

Pinole

Pinole

TOP

hunt-kuiu-com-logoDIY High Calorie Bars

KUIU DIY High Calorie Bars

KUIU DIY High Calorie Bars


In preparing for a backpack hunt there aren’t many places where we can increase our performance:weight ratio and save money at the same time. Luckily (since it’s an expendable or one-time-use item) food is one area where with a little extra at-home preparation and research, one can increase the calorie density of their consumables while saving money over the course of a season.

The most simple way to start is by making your own calorie-rich snack or energy bars. We burn so many calories in the mountains that persistent re-fueling is essential to maintaining our drive day in and day out. Keeping convenient trail food handy is the only way to assure frequent eating on the go. Unfortunately, altitude, physical exertion, and fatigue have a way of curbing hunger, making proper eating habits easier said than done. This is where the calorie density of our food becomes incredibly important: when we don’t feel like eating, every bite we take matters.

Some type of store-bought bars, whether they be Cliff Bars, Power Bars, etc. can likely be found in nearly everyone’s pack at any given time. You can do better though… read on to learn how.

Making the Bars

Making your own high-calorie bars that put the store-bought stuff to shame is quick and easy. You might spend more time wandering around the store looking for Dried Dates than you will making the bars. And don’t worry, there’s no oven involved so this isn’t considered “baking”. The only kitchen supplies you’ll need are a food processor, a bread loaf pan, measuring cups, and some wax paper. If you want to accurately calculate the calories in each bar, a kitchen scale will come in handy.

  • Ingredients
  • 1 1/2 Cups Dried Dates
  • 1 1/4 Cup Dried Cranberries
  • 2 Cups Dry Roasted Peanuts


KUIU DIY High Calorie Bars Step 1

KUIU DIY High Calorie Bars Step 1

Chop the two cups of peanuts in the food processor until they look like mine below. Consistency should range from sand-like to pea-sized. Pour the peanuts into a bowl and put the cranberries and dates into the processor. Run these together until a thick paste forms.


KUIU DIY High Calorie Bars Step 2

KUIU DIY High Calorie Bars Step 2

Put everything together in a bowl and mix evenly by hand.


KUIU DIY High Calorie Bars Step 3

KUIU DIY High Calorie Bars Step 3

Line your loaf pan with wax paper and spread the mix evenly on top.


KUIU DIY High Calorie Bars Step 4

KUIU DIY High Calorie Bars Step 4

Add a second sheet of wax paper on top and press mixture into the bottom of the pan by hand or with some kind of roller. The tighter you can pack to down, the better your final product will hold together.


KUIU DIY High Calorie Bars Step 5

KUIU DIY High Calorie Bars Step 5

Once pressed hard and tight, the mix will keep its shape. Take it out of the pan and lay it in the freezer for 30-45 minutes to harden.


KUIU DIY High Calorie Bars Step 6

KUIU DIY High Calorie Bars Step 6

Once hardened in the freezer, take it out and cut into bars. By weighing and adding up the calories of the entire batch, you can cut your bars to any desired per-piece calories by weighing them out.


KUIU DIY High Calorie Bars Step 7

KUIU DIY High Calorie Bars Step 7

Wrap individually with saran wrap and you’re done. Store them in the freezer, fridge, or wherever you want. They’ll last a few weeks unrefrigerated, and much longer if frozen.


KUIU DIY High Calorie Bars

KUIU DIY High Calorie Bars

Caloric Analysis

Now let’s look a little deeper into what we just made, and compare it to what we would usually buy at the store.

  • 1 1/2 Cups Dried Dates (792 Calories)
  • 1 1/4 Cup Dried Cranberries (660 Calories)
  • 2 Cups Dry Roasted Peanuts (1,642 Calories)
  • Total Weight ~1.4 lbs (22.4 oz)
  • Total Calories ~3,094
  • Total Protein ~74 grams
  • ~138 Calories/Ounce
  • This puts the 3.15 oz bar pictured above at 434 calories!

By Comparison, a 2.4 oz Peanut Butter Crunch Cliff Bar supplies 104 Calories/Ounce, for a total of 249.6 calories. Sure, if the Cliff Bar weighed the same as the homemade sample above it would be closer at 327 calories… still 107 calories short, and you’d have to buy another Cliff Bar.

For the sake of another mainstream comparison, PowerBar’s latest Performance Energy bar weighs 2.01 oz and offers 220 calories, for a less than stellar 109 Calories/Ounce. At least they have catchy packaging.

Lastly, while not necessarily apples to apples, Mountain House’s most calorie-dense dinner entree option is Mac and Cheese, coming in at about 130 Calories/Ounce.

So just how much difference does it make to eat the homemade 434 calorie bar on the go vs a 250 calorie store-bought bar? According to a popular online calorie estimate calculator, the extra 184 calories in the homemade bar is enough energy to allow a fit 175 lb man hike about a mile while wearing a 30lb pack.

Substitutes and Additions

One could easily add and substitute ingredients to the recipe. Apparently orange zest in the mixture enhances flavor, although I have not tried it as I like the taste as-is. By using Macadamia nuts instead of Peanuts, the calorie density would increase slightly, although the protein would drop significantly.

Whether you decide to stick with the recipe above or play around with ingredients on your own, rest assured that you’ll end up with a final product that adequately addresses your backcountry nutritional needs. Good luck.

-Todd Harney
TOP

Happy Purim

Auntie Nosebag Hamentashen

Auntie Nosebag Hamentashen

Hamantashens

3 eggs

1 cup oil

1 cup sugar

2 tsp. Baking powder

½ cup water

½ cup orange juice

1/8 tsp salt

4 cup flour

orange zest

2nd Hamantashen recipe

4 eggs

1 cup sugar

½ cup oil

Juice and zest of one lemon

1 package of vanilla sugar

5 cups of flour

2 tsp. Of Baking powder

Mix dough and put in frig for one hour. Roll out and cut in circles and fold up into triangle with jam as filling. Traditional |Hamantashens have poppy seed filling or prune. Bake at 350 degrees for about 15 minutes.

TOP

Auntie Nosebag Clown

Auntie Nosebag Clown

Purim Chocolate Babka

How to Make Chocolate Babka

A Purim favorite!

Ingredients:

2 oz fresh yeast (or 6¾ tsp dry yeast)
½ cup warm water
6½ cup flour
½ cup sugar
12 oz margarine (3sticks) (1 1/2 Israeli margarine sticks)
½ cup warm orange juice
4 eggs
- pinch salt
- Filing:
2 cup sugar
½ cup confectioners sugar
1 cup sifted cocoa
2 Tbsp coffee granules (maybe 1 Tsp)
1 Tbsp vanilla sugar
- Topping:
4 oz margarine (1stick)
½ cup sugar
1½ cup flour
1 Tbsp vanilla sugar
- To assemble:
- oil for smearing
1 egg, beaten for egg wash

Directions:

Dough: Dissolve the yeast in the water with a drop of the sugar.
After it has completely dissolved, combine with the remaining
ingredients in the mixer bowl. Mix well with a dough hook to obtain a
smooth dough. Cover and allow to rise for 1 hour.
Filling: Mix all ingredients and mix well.
Topping: Mix by hand to form crumbs.
To assemble: Preheat oven to 350F
Grease 3 loaf pan. Divide dough into 3 parts. Work with one section at time.
Roll the dough to double the length of the pan (about the size of
a cookie sheet) and smear with oil. Smear 1/3 of the chocolate filling
over the dough. Roll up jelly roll style and pinch the ends closed.
Fold the roll in half and twist 3 times. Transfer to loaf pan.
Brush with beaten egg. Sprinkle the streusel over the entire roll.
Repeat with the remaining two parts of dough.
Bake for 1 hour.

TOP

Wednesday, January 23, 2013

Auntie Nosebag’s Monkey Face Cookies


2 ½ cups flour

1 tsp baking soda

½ tsp. Salt

1 tsp. Ginger

1 tsp. Cinnamon

½ cup shortening

1 cup brown sugar

1 tsp. Vinegar

½ cup sour milk or rice milk with 1 tsp lemon juice

½ cup molasses

raisins for eyes


Mix dry ingredients.

Cream shortening and sugar until fluffy.

Add vinegar and blend well.

Combine milk with molasses.

Add dry ingredients together with wet ingredients very slowly, if you put under beater it will spray your face.

Drop by teaspoonfuls on ungreased cookie sheet.

Bake at 350 degrees F for 10 to 15 minutes.
Yum.


Monkey face cookies

Monkey face cookies


 TOP

Friday, December 28, 2012

Auntie Nosebag’s Leftovers pot soup

Auntie Nosebag Leftover pot soup

Auntie Nosebag Leftover pot soup

Recipe by Auntie Nosebag,

This recipe is from my Great Grandmother,Kibbitz, who thought leftovers were so very useful indeed!
One chicken carcase
or a few pieces of chicken like wings, neck, back.
add one chopped up onion
3 Tb. tomato paste
rummage in your frig. bin for pieces of cabbage, celery, carrot, potato, cilantra, parsley,old tomato,
left over rice
2 Tb. Miso
fill pot with filtered water, put everything in the pot and cook for
several hours on low, at the end add some flat noodles for about 10
minutes and serve for dinner.
TOP

Wednesday, 28 September 2011

Auntie Nosebag wishes everyone a good year and a sweet year on Rosh Hashanah.

Auntie Nosebag Tzimmes Recipe

Auntie Nosebag Tzimmes Recipe


Sweet New Year’s Tzimmes

1/2 pound dried apricots
1/2 pound dried pears
1/2 pound unsweetened prunes
3 pounds of brisket
2 tsps of salt
1/4 tsp pepper
3 carrots quartered
6 thin slices of lemon or lime
2 cups orange juice
4 cups water
4 Tbls honey
Wash the apricots, pears and prunes and soak in cold water to cover for 1
hour. Drain.
Brown the meat over medium heat in a Dutch oven or casserole. Sprinkle with
salt & pepper. Arrange fruit, carrot & lime around it. Mix orange juice,
water & honey together & pour over it. Cover & bake in a 350degree oven for
3 hours. Remove the cover and increase heat to 400 degrees. Bake 1 hour
longer, adding a little water if necessary. Serves 6 to 8.

TOP

Friday, 29 July 2011

Auntie Nosebag is on Sabbatical, So Duke will introduce you to Barak’s Famous Tex-Mex Chili


Auntie Nosebag is on Sabbatical, So Duke will introduce you to Barak's Famous Tex-Mex Chili

Auntie Nosebag is on Sabbatical, So Duke will introduce you to Barak’s Famous Tex-Mex Chili


Dog Gone Good Chili

Serves 8 to 10 servings
Ingredients:
500 grams beans
2 onions chopped
500 grams beef cut up or
250 grams soy nuggets for vege chili
2 bell peppers
3 tomatoes
3 cut up hot chili peppers
2 Tb. Cumin
2 Tb. Sweet paprika
1 Tb. Hot paprika
1 Tb. Oregano
1 bunch cilantro
1 purple onion chopped
1 Tb. Tehini paste for sauce
1 Tb. Salt or to taste
Olive oil
Soak and cook beans as to package directions…

(warning! click here to see what happens if you don’t soak the beans.)

the longer and longer and longer they soak and you change the water and change the water and change the water the less gas you will experience afterwards.
If using soy nuggets, presoak them in water ,soy sauce and cumin and squeeze after 10 minutes.
Cut up peppers and remove seeds and white veins and put aside.
Chop all onions up and keep separate.
Chop cilantro up.
Chop tomatoes up.
Cook onions in oil till golden and add soy nuggets or meat and brown. If you decide to use soy nuggets you know it tastes just like meat! Then add all the peppers and tomatoes and you get a nice blend. If you want to sicken everyone in the house brown the hot peppers in a bit of oil and watch everyone start coughing but if not just put them in the pot and close the lid. Oh no just kidden folks don’t do that it will make everyone start coughing and you’ll have to open all the windows. Let this cook and when after you slow cook this for several hours you can add the cumin, cilantro, tehina paste and paprikas and stir for another half hour. These chili can improve with age if you keep it going and makes a great alternative to Cholant.

TOP

Wednesday, 27 July 2011

With all the news about Norway, I thought we needed some Norwegian Smorgasbord recipes. This one is so easy to make as well, enjoy darlings.

Auntie Nosebag wears the latest Norwegian Nazi School Uniform in honor of the Durban III conference which the Oslo Hitler youth are going to, in support of Boycott Divestment & Sanctions(BDS) of Jews and Israel

Auntie Nosebag wears the latest Norwegian Nazi School Uniform in honor of the Durban III conference which the Oslo Hitler youth are going to, in support of Boycott Divestment & Sanctions(BDS) of Jews and Israel

Auntie Nosebag wears the latest Norwegian Nazi School Uniform that the new Hitler youth wear, in honor of the Durban III conference which the Oslo Hitler youth are going to, in support of Boycott Divestment & Sanctions(BDS) of Jews and Israel

Auntie Nosebag’s Sweet and Sour Norwegian Meatballs

1 12 oz jar Chili Sauce
1 16-18oz jar grape jelly*
2lb frozen meatballs or 2-3 packages cocktail sausages

*note that you could use the smaller jar of jelly instead, I think it’s more like 10oz. I like the sweetness of the 18oz jar, but you could make it less sweet with the small jar if you prefer.
Combine jelly and chili sauce in a crock pot an stir until smooth. Heat the mixture if needed to combine. Add meatballs or cocktail sausages and set temperature to low. Cook for 2-5 hours on low. Serve with toothpicks.
***Also for another alternative sweet and sour sauce
2 cans cranberry sauce
2 cans tomato sauce

If you want more information about the new Nazi Hitler Youth school uniforms that Auntie Nosebag wears, Click Here! If you want to save yourself and your family from the new Nazi Hitler Youth and the Boycott Divestment & Sanctions(BDS) of Jews and Israel, Click Here!

National Socialist Movement rally in Madison WI 2006

Field of Vision – A Night at the Garden from Field of Vision on Vimeo.

In 1939, 20,000 Americans rallied in New York’s Madison Square Garden to celebrate the rise of Nazism — an event largely forgotten from U.S. history. A NIGHT AT THE GARDEN, made entirely from archival footage filmed that night, transports audiences to this chilling gathering and shines a light on the power of demagoguery and anti-Semitism in the United States.

Directed by Marshall Curry
See more from Field of Vision here: fieldofvision.org
For more on the rally, read a Q&A with Marshall Curry here:
fieldofvision.org/q-a-with-a-night-at-the-garden-director-marshall-curry
TOP

כ״ז אדר א’ ה׳ תשע״א – Thursday 3 March 2011

Auntie Nosebag and Christian Dior

Auntie Nosebag and Christian Dior

Auntie Nosebag’s English Crumpets:

Darlings, my therapist suggested toning things down so I’ve decided to have a new look as well. In order to help improve my popularity I’ve decided to purchase a new Christian Dior outfit and perfume! Don’t you just love it! Crumpets are so British, and the world seems to be watching England lately, and what’s tea time without English Crumpets, so here they are.

ENGLISH CRUMPETS Recipe

Ingredients:
3 T. warm water
1 pkg. yeast
1 tsp. sugar
1/2 C. milk
4 T. butter, divided
1/2 tsp. salt
1 1/2 C. flour
1 egg
Directions:
Combine water, yeast and sugar. Let stand until bubbly, about 5 minutes. Heat milk, 1 tablespoon of the butter and salt in a saucepan over low heat just until warm. Add to yeast mixture. Add 1 cup flour to yeast mixture and beat until smooth, about 2 minutes on medium speed of mixer. Beat in egg. Add remaining flour and beat until smooth. Cover batter with plastic wrap and let rise in a warm place until doubled in bulk, about 1 hour.
Stir down batter and let rest for 5 minutes.
Meanwhile, melt remaining butter in a saucepan over low heat. Skim off foam and discard milky solids from bottom of saucepan. Brush bottom of a skillet with melted butter. Brush insides of four crumpet rings or 3-inch round cookie cutters with butter and place rings in skillet. Heat skillet over medium heat. Spoon about 2 tablespoons batter into each ring. Cook until batter begins to bubble on top and is lightly browned on bottom, about 2 minutes. Remove rings. Turn English Crumpets over. Cook until lightly browned on bottom and done in centers. Can be served warm or split and toasted before serving.

John Galliano, fashion designer


John Galliano, fashion designer Nazi slur

John Galliano, fashion designer Nazi slur

From Wikipedia, the free encyclopediaIn October 1996, LVMH moved Galliano to Christian Dior, replacing Italian designer Gianfranco Ferré.
In 2010, Galliano identified his love of theatre and femininity as central to his creations; he said “my role is to seduce”, and credited Standard Oil heiress Millicent Rogers as an influence.
Anti-Semitic remarks and repercussions
On 25 February 2011, Dior announced that it had suspended Galliano following his arrest over an alleged anti-Semitic tirade in a Paris bar. The same day, Paris-based citizen journalism site Citizenside received video of Galliano on a similar rant in the same bar the previous December. In the video a drunk Galliano, seated at table à L’Absinthe, insults a group of Italian women and declares “I love Hitler… People like you would be dead. Your mothers, your forefathers would all be fucking gassed.” This incident happened just before Paris Fashion Week for Autumn/Winter 2011-12.
Natalie Portman, an Israeli-American actress, whose great-grandparents died at Auschwitz, had an endorsement contract with Dior for its Miss Dior Cherie fragrance. In a statement, she expressed “disgust” at Galliano’s anti-semitic comments.Portman said: “I am deeply shocked and disgusted by the video of John Galliano’s comments that surfaced today…I hope at the very least, these terrible comments remind us to reflect and act upon combating these still-existing prejudices that are the opposite of all that is beautiful.” Not everyone in the fashion industry shared Portman’s disgust. Stylist and costume designer Patricia Field defended Galliano by sending an email to 500 friends, blogs and media. She dismissed Galliano’s rants as “theatre.” Later, in a phone interview with Women’s Wear Daily, she described Galliano’s videotaped behaviour as “farce” and said she was bewildered that people in the fashion community have not recognised it as such. “It’s theatre … It’s farce. But people in fashion don’t recognise the farce in it. All of a sudden they don’t know him. But it’s OK when it’s Mel Brooks’s The Producers singing ‘Springtime for Hitler’”, Field added. Another model for Dior, French actress Eva Green, said of the incident: “Sometimes, you can make mistakes. I don’t think he’s anti-semitic. I’m Jewish. I don’t think he has anything against the Jews. I think it’s more that he was probably a bit drunk.”]
On 1 March 2011, Dior announced that it had begun procedures of dismissal for Galliano, with Dior’s chief executive Sidney Toledano stating, “I very firmly condemn what was said by John Galliano”. Galliano denied the allegations through his attorney, and launched a defamation lawsuit against the couple accusing him of antisemitism. Various rumours have also surfaced stating that he was set up. “From the very first day of Fashion Week, many editors have been saying that Dior wanted to get rid of him and that a plot like this would save it from having to pay him a reported £17 million”, said Marcellous L. Jones, editor-in-chief of fashion web magazine TheFashionInsider.com. Dior announced it will continue to support the Galliano brand financially due to license despite his previous scandal involving alleged anti-semitic remarks.
Criminal charges
On 8 September 2011, he was found guilty of making anti-Semitic remarks. John Galliano has been sentenced to pay a total of €6,000 (US$8,400) in suspended fines after a French court found him guilty of giving public insults on account of race.
TOP

כ״ב שבט ה׳ תשע״א – Thursday 27 January 2011

She’s vile, she’s uncensored, she tells it like it is: She’s Auntie Nosebag

Great fun reading unless she’s talking about you “darling!”

Dears, Now that you’ve read my Astrology Column I wanted to share my marvelous wisdom with you….Uranus has been playing hide and seek with Mars this month while Pluto has triangulated with Venus which will wreck havoc on people’s digestive enzymes for the next few weeks. I always try to lower the acidic levels by eating vegetables in creative fun ways. Try my stuffed mushroom recipe for a real treat.

24 large mushrooms

¼ cup sliced green

Foods of the Zodiac: I just love fatty desserts, just go ahead

Foods of the Zodiac: I just love fatty desserts, just go ahead

onions

1 clove garlic, minced

¼ cup butter

2/3 cup bread crumbs

5/8 cup shredded smoked cheese

  • Rinse, mushrooms and remove stems, reserve caps.

  • Chop stems and cook with onions and garlic in butter until tender. Stir in bread crumbs and cheese.

  • Spoon mixture into mushroom caps and arrange in dish and bake 425 degree oven for 10 minutes.

**You can even add those left over cooked veges to add extra flavor and utilize those left overs.

TOP

Blazing Saddles –Farting Cowboys- Greatest Fart Scene of All Time


Print Friendly, PDF & Email